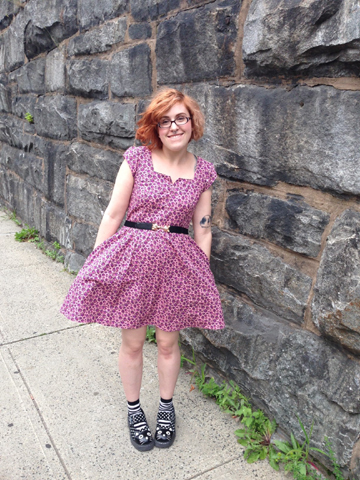
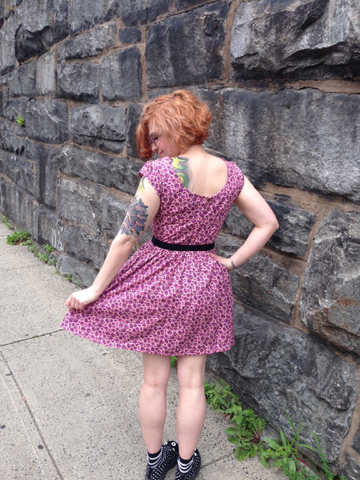
I finished the day after the deadline...but I finished my Outfit Along dress all the same!
 I went with the official OAL pattern, Simplicity 1803. This is bodice view C with cap sleeves. I cut a 6 on top and graded to an 8 for the bottom, since the finished measurements for the waist on a size 6 was my exact waist measurement and I wanted to have room to move, but I probably didn't need to do that as I wound up taking out a lot of ease at the waist when I put the zipper in. I also made the adjustments for petite ladies because I'm short, yo. The only other mod I made to the original pattern was moving the pockets to the side seams where they BELONGED rather than keeping them in the weird princess seam panels along the front.
 The fabric is a Betsy Johnson floral cotton print I bought from Mood Fabrics, which was really fun because I could pretend I was on Project Runway when I got the package in the mail. It's definitely super girly, but I don't have any girly pink floral dresses! I wore it belted with my kitty shoes yesterday (for comfort) but I can totally see this with flats, sandals, heels, a slouchy cardigan in winter....lots of options.
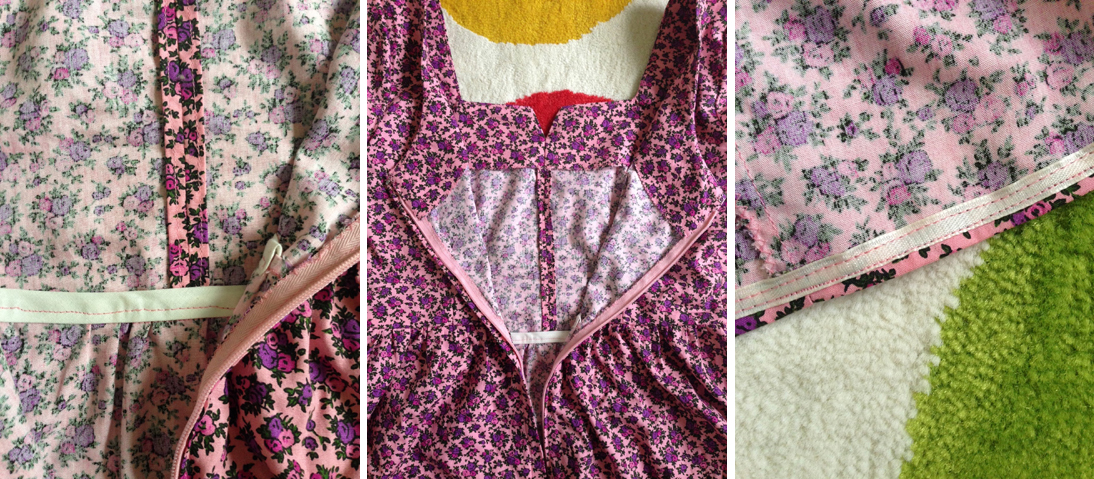
I am really proud of the insides of this dress! For those of you that don't know, I've been sewing since I was a teenager but I always made up my own patterns because I didn't have the patience and understanding to follow patterns. I even participated in a fashion show in high school with my own collection! I never finished seams and worked a lot with knits, where it didn't matter that I didn't finish seams. So this dress is pretty special to me since it's probably the first time I have followed a pattern to the letter AND did all those professional niceties to the insides.
 To stretch my wings I used a variety of techniques. I did clean finish seams on the center and sides of the bodice, zig zag edges for the princess seams, skirt and sleeves, and a bound seam for the waistband with bias tape. (Plz to be ignoring my less than perfectly straight stitching on the waistband and hem.) For the hem, I chopped a bunch off since the dress as it stood was too long for lil ol' me, but I calculated wrong and chopped too much off to do a turned hem. Thank god for Lauren and her wonderful OAL posts--I stole her idea of hemming using seam binding! I used some cream ribbon I had on hand to match the waist binding, though by that point I was pretty fed up by fussing with the hem so my stitching is terribad. You can't see the thread from the right side though so IDGAF.
You'll notice I didn't make a full outfit--I have enough knitting to do for work that I wasn't up to knitting an accompanying piece. I am so glad Andi and Lauren put this together though! I feel like my sewing mojo is in full swing and I am super excited to add more pieces to my handmade wardrobe.
