fo

New Pattern Release: Klystron

Earlier this week I released my Klystron shawl pattern!

All photos by Lindsey Topham

All photos by Lindsey Topham

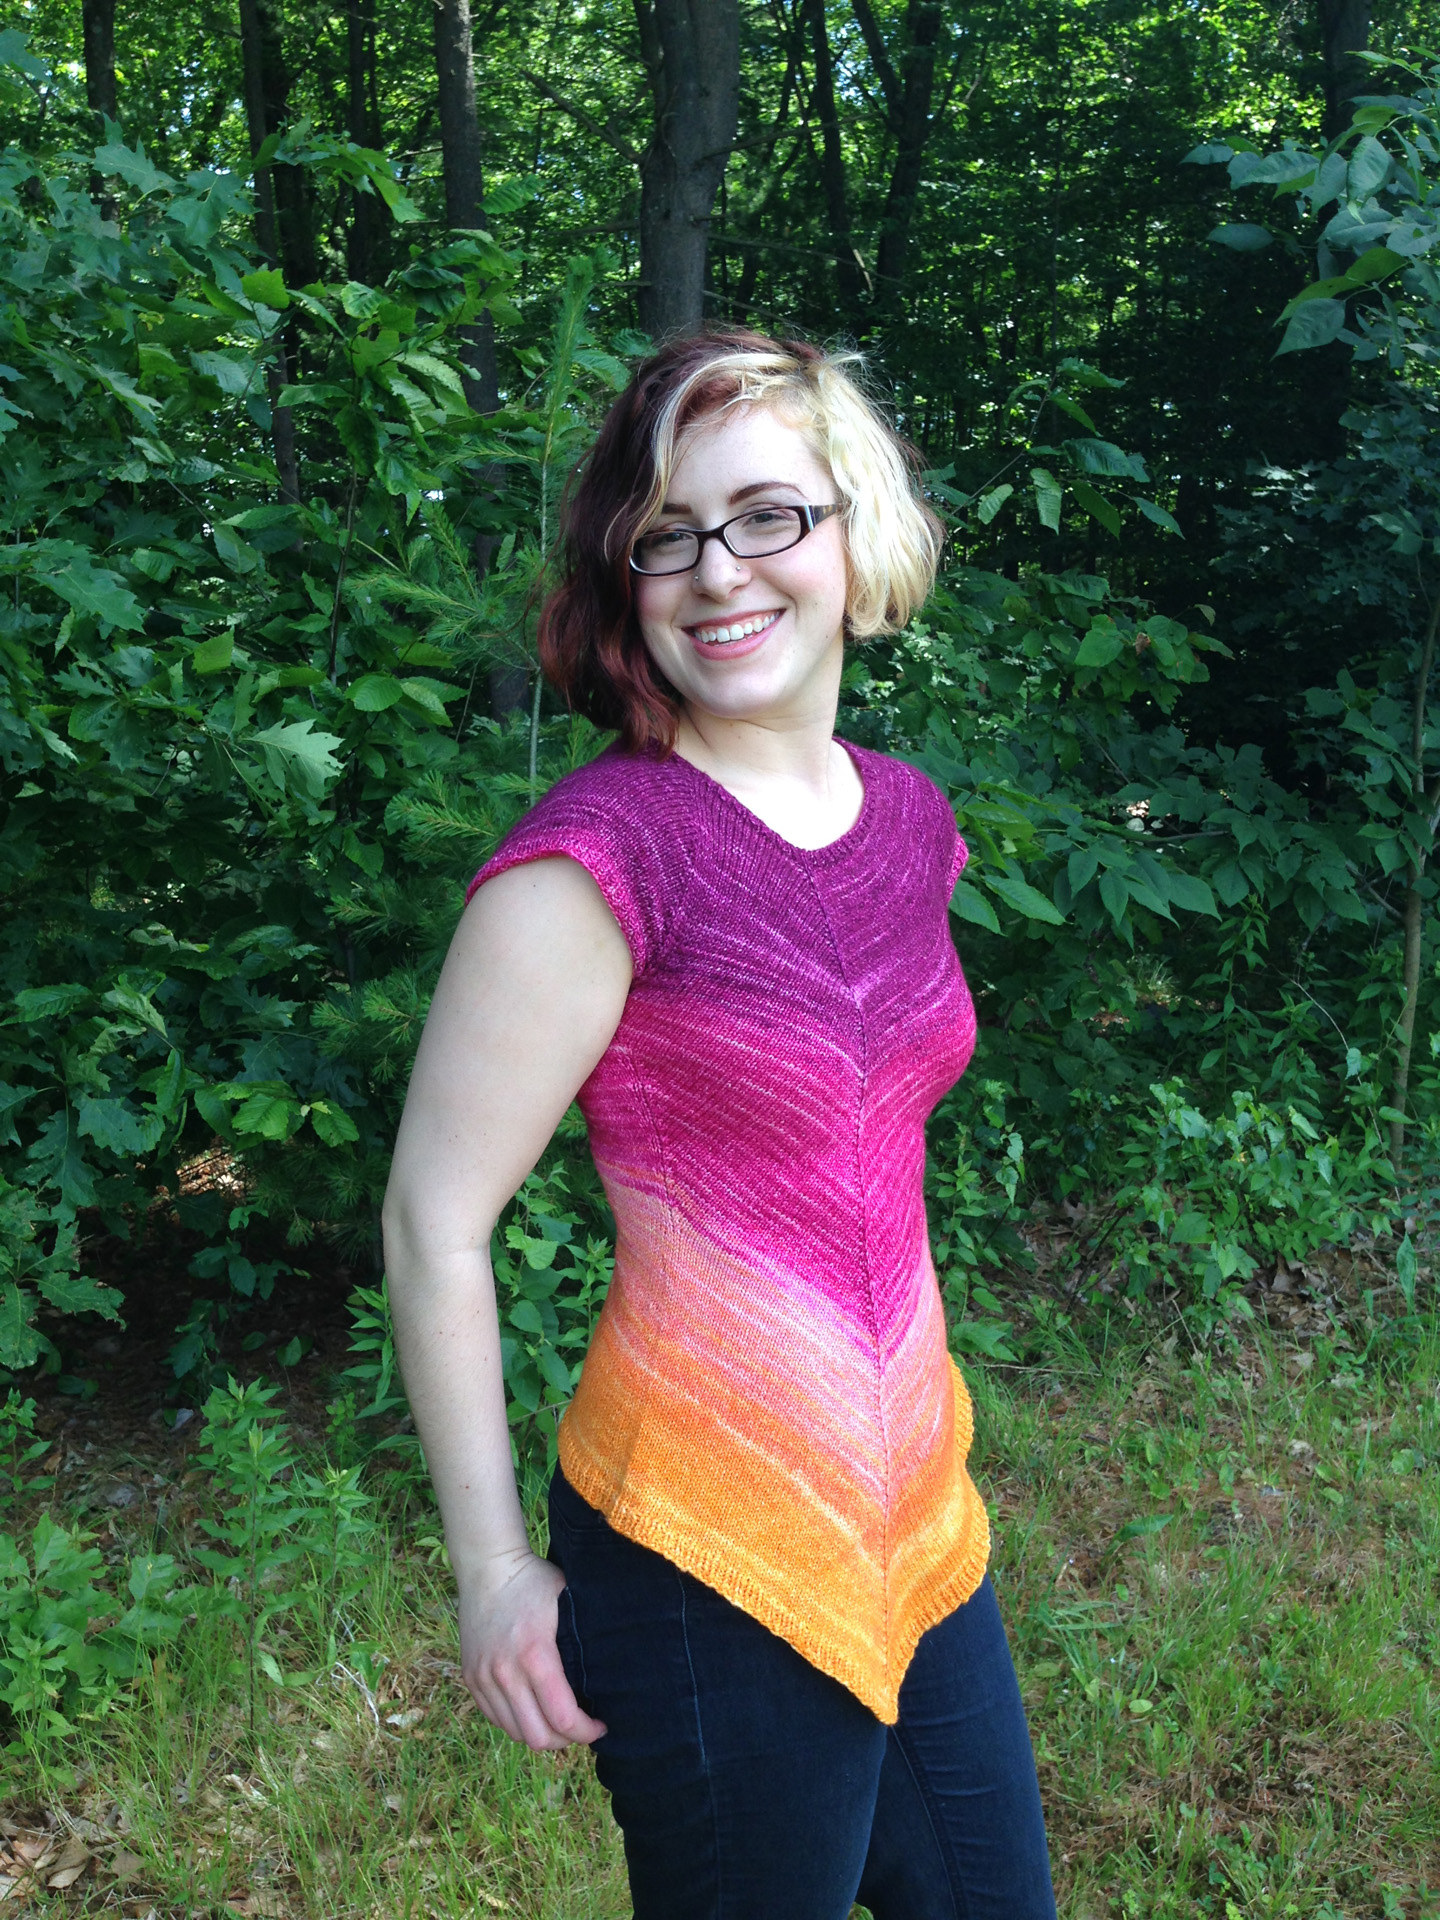
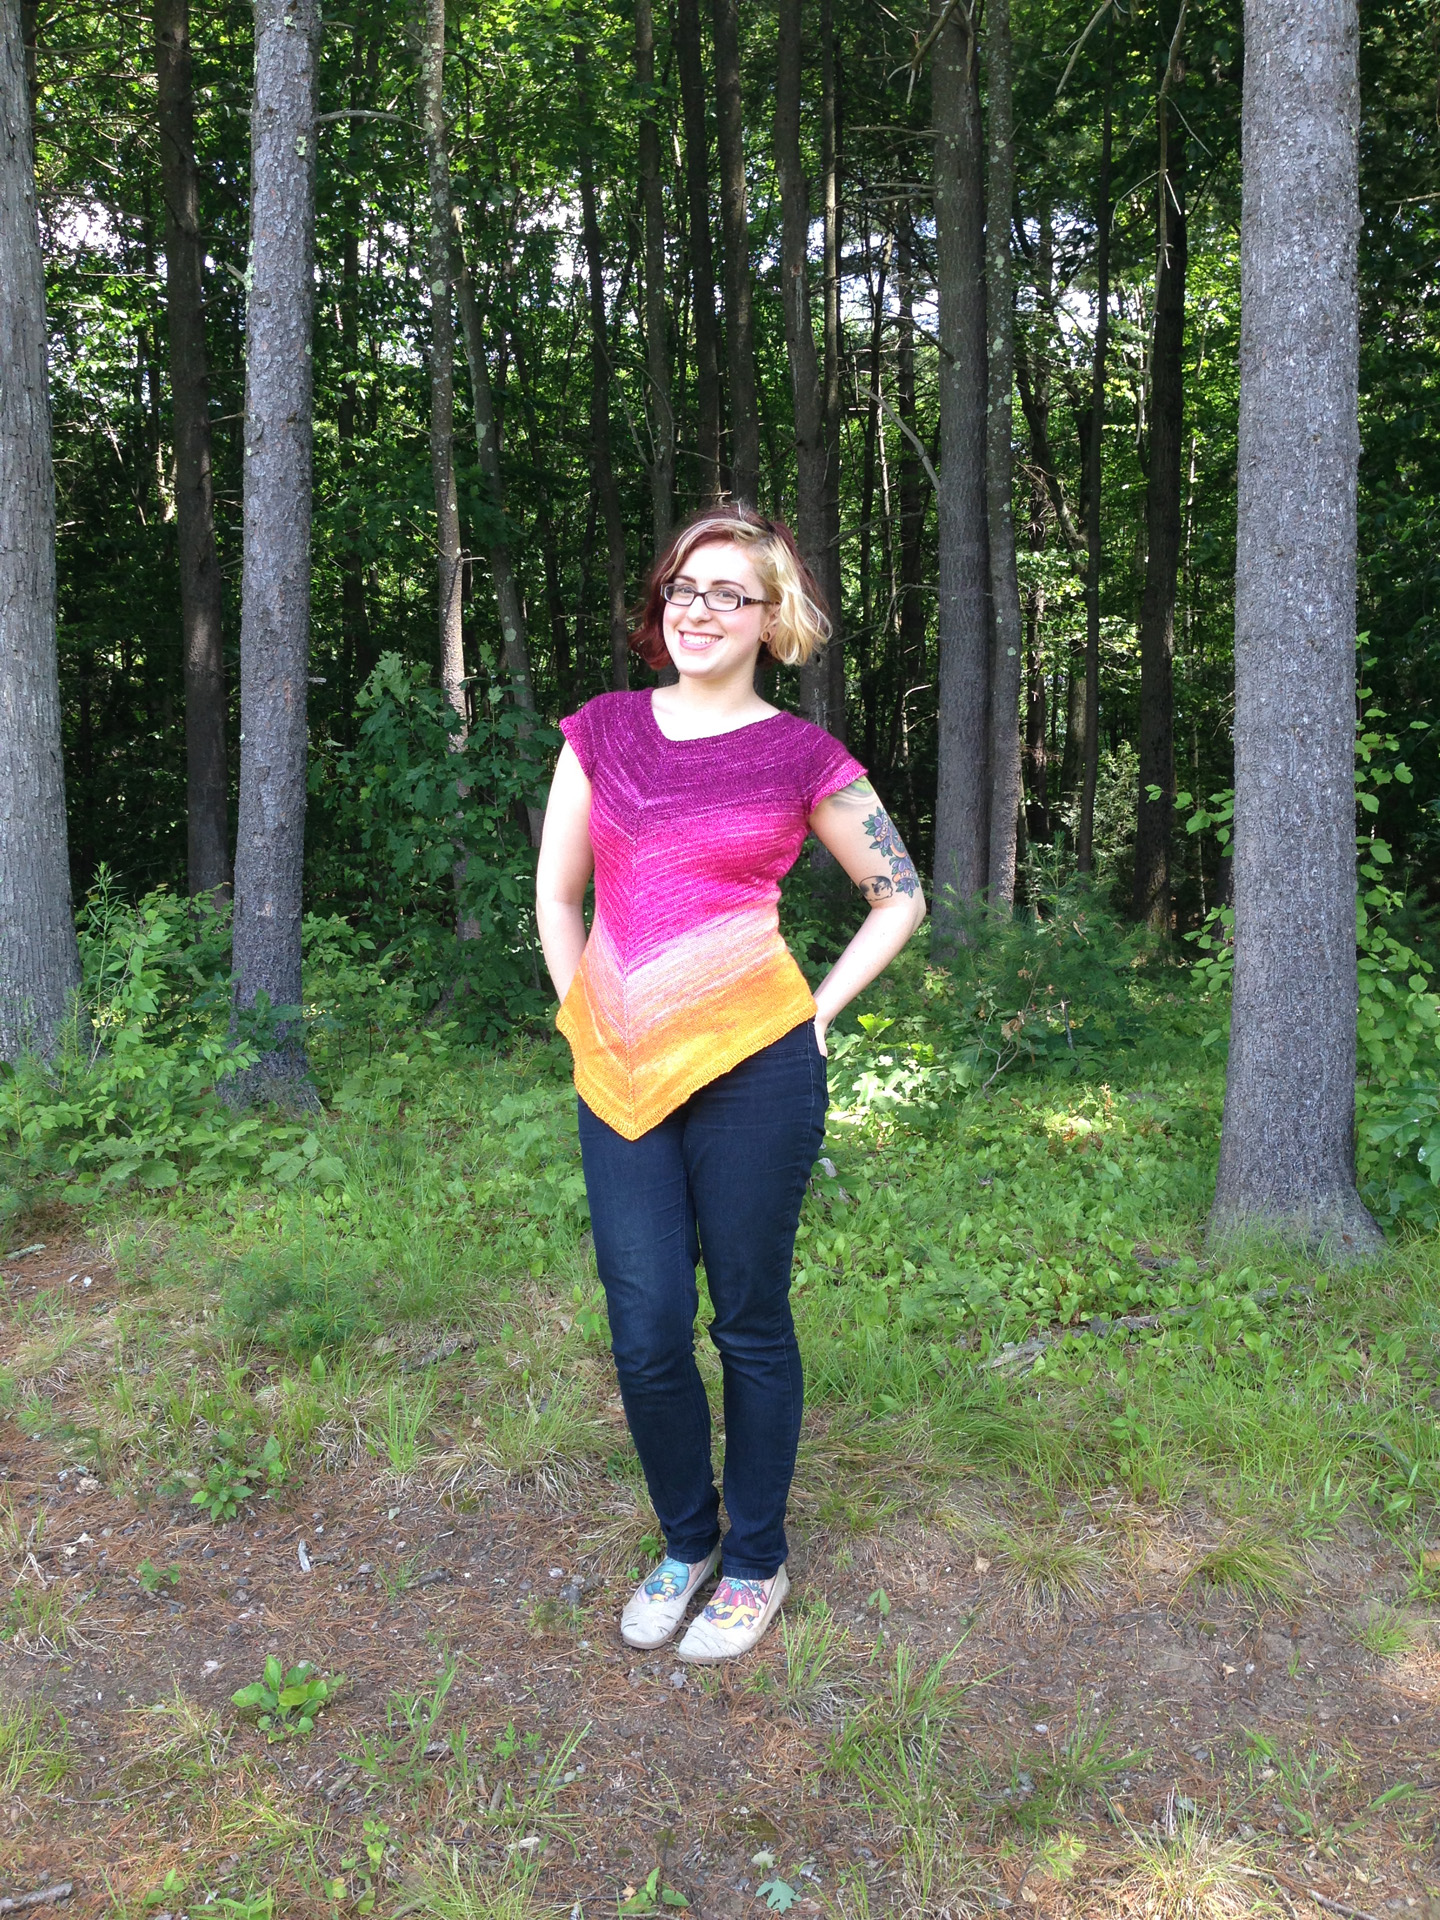
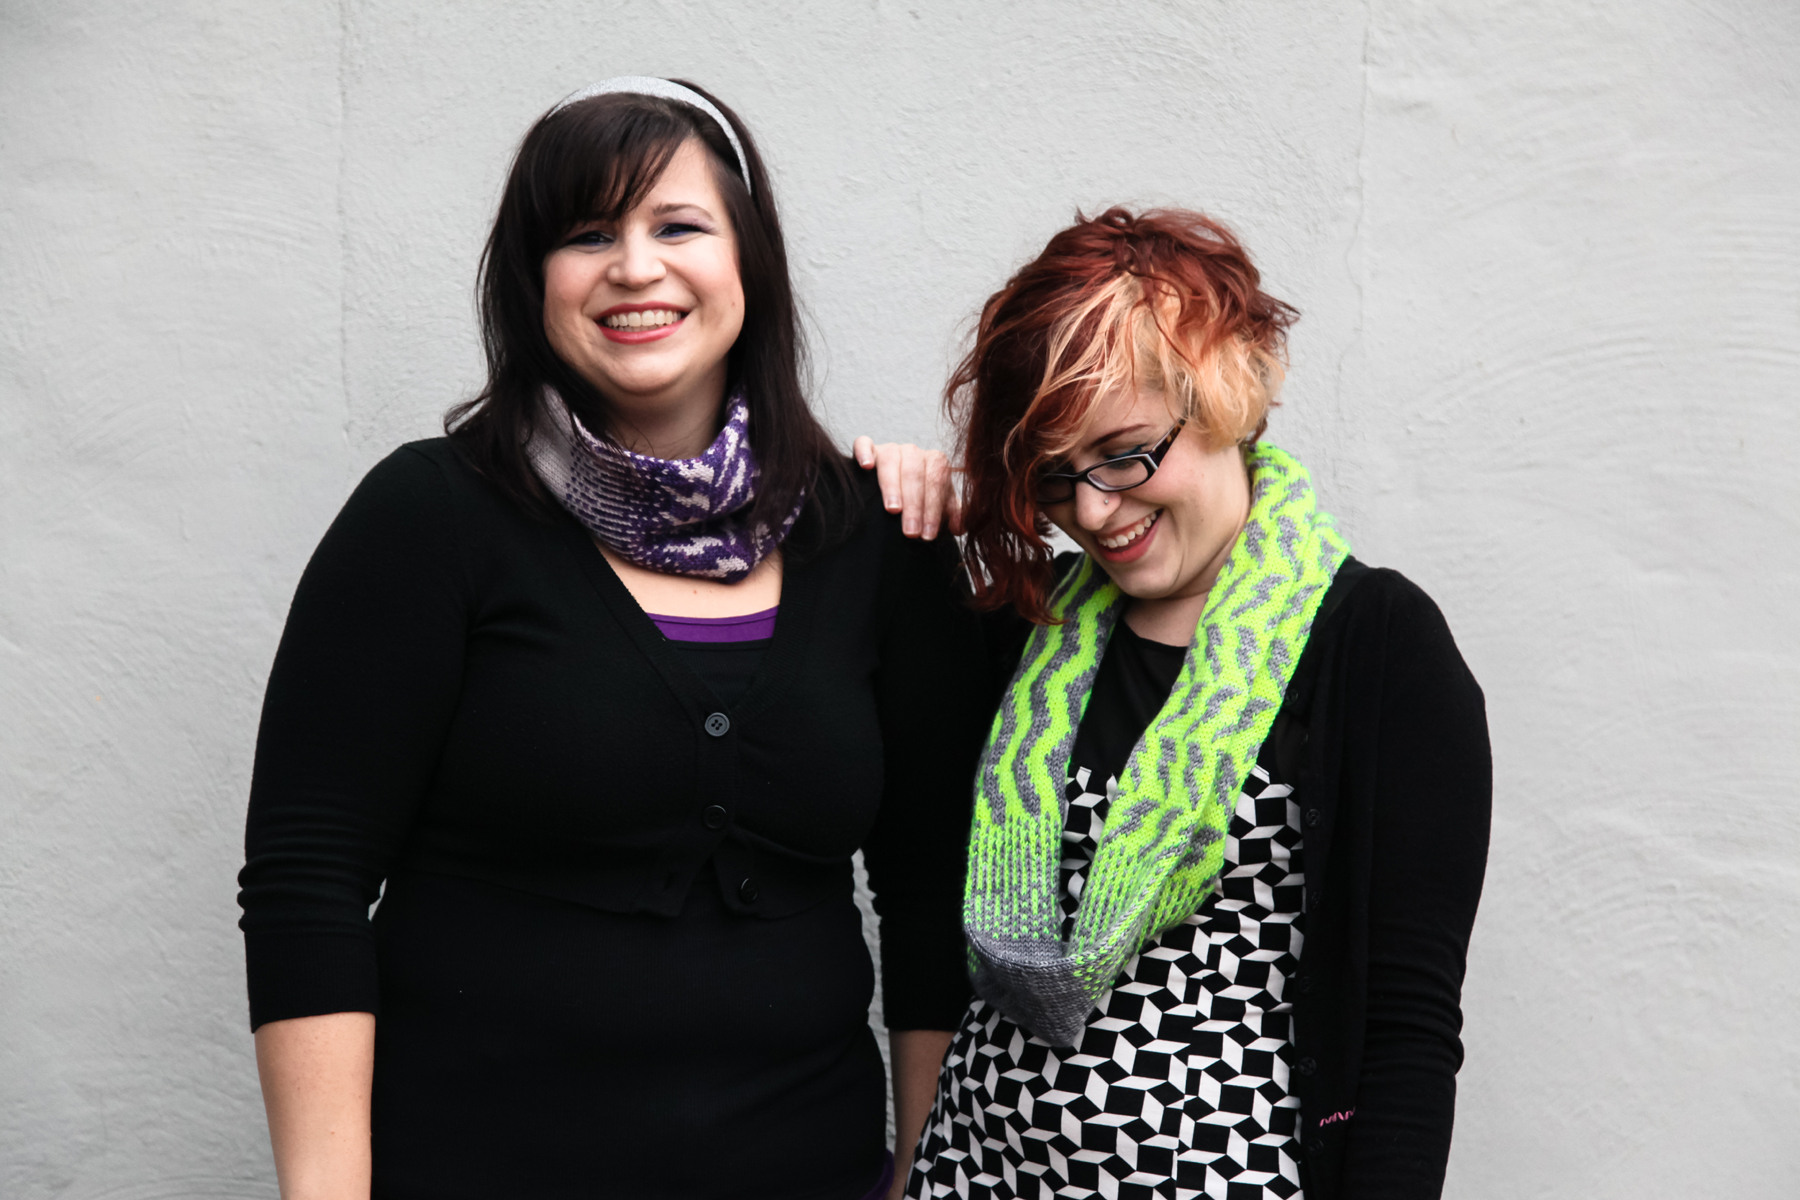
I wanted to play with color and texture in this pattern, so I combined garter stitch, brioche, and intarsia. This asymmetrical shawl is knit end-to-end. It uses intarsia to create a smaller accent panel of contrast color (the purple) which runs along side the main body of the shawl, while regular rows of brioche interrupt the garter stitch fabric. Shaping is worked at the ends of rows and on either side of the off-center spine, to separate out the two colors and to create an unbalanced arrow shape at the end after binding off:

The yarn is Shalimar Yarns Aerie, which is a gorgeous single-ply blend of merino, kid mohair, and silk. Thanks to the silk and mohair, the yarn has a subtle sheen and slight fuzz which really elevates plain garter stitch to the next level. 

Klystron is available for purchase on Ravelry for $5.

Summer of Basics FO #2

I have been planning to make a Wiksten Tank for over a year now, and I finally finished it up!

I made the dress version as a muslin a year ago with some stash fabric I already had--another cotton, but a lighter, floatier cotton than this fabric (by Rae Ritchie from the Desert Bloom Collection.) I found there was too much fabric in the upper back with that muslin, so on this version I took about an inch out of the upper back simply by angling the placement of the back when cutting it out, as described here. I cut a size S, based on my muslin and my old bust size of 33". TMI: Since then I've switched birth control methods and my breasts have grown a little, so I'm more like a 34" now. I discovered this fact when I found the bust area too snug once I tried my tank on! I wound up unpicking the top third of the French seams and redoing them with smaller seam allowances so I would have enough room in my bust area.

I decided to lengthen and widen the armholes based on my favorite Madewell tank top, since I found them too tight for my liking. I just laid that tank top over this one, traced the new armhole lines and trimmed the excess fabric off. It wasn't a lot, maybe 1/2-3/4" at most at the bottom of the armhole, but it did change the curve slightly in a way that better accommodates my arms/shoulders, or at least my fit preferences for that area! I had to add some extra fabric to the bias facings for the armholes to accommodate the new dimensions, so I fudged it by adding a little piece onto my existing bias strip rather than cut a whole new one because I'm lazy, and it's going in my goddamn armpit anyway, who cares! I followed this Grainline Studio tutorial for the arms and neck since I was having a hard time understanding the Wiksten directions.

However, I have some issues with the overall finished product that I THINK is due to my material choice, but I'd love to hear advice from more experienced sewists on it. This cotton was listed as being fine for quilting and apparel, though after reading up on the 'can quilting cottons be used for garments' debate that I was unaware of, I suspect that this cotton would be better suited for more structured garments and not a floaty tank top. It's funny--I'm so comfortable with yarn choice that I don't question myself in that area, but now I'm realizing how unfamiliar I am with fabrics and that I need to be extra careful in buying online!

You can see below how the tank fits decently (I think...) in the upper back, but the extra fabric in the body due to the A-line shape just pools weirdly due to the stiff cotton rather than flowing away from my body. That's the fabric's fault, right? Right?!

If you look back at the top photo, the bottom center of the neckline tends to flip out a little. Not sure what causes that!

Another mystery to me is the below issue. When I'm moving around and not adjusting the garment, tugging it down, etc, it creeps up and I get the armhole gap and raised shoulder/back neck as seen on the left. On the right is how it fits when I adjust it back down.

I have to admit, I really loved this print so I'm bummed this isn't the tank of my dreams, but I've convinced myself (rightly or wrongly!) that it's simply a bad fabric choice for this garment and not due to my newb sewing skills, so I've accepted the flaws. It looks fabulous with a cardigan on though! I'm looking forward to trying the Wiksten Tank again with a more drapey fabric, and would love to hear from you all about your tank fitting wisdom.

Summer of Basics FO #1

I knocked out my first item for the Summer of Basics Make-Along on Day 1!

To test drive Fancy Tiger Crafts Fen before starting my dress version, I used stash crepe de chine to try to the top. I was ok with this turning out totally unwearable, since I'm not too attached to the fabric. Luckily, it worked beautifully and I really like this top!

My body measurements put me at a size 4, and since I wanted all the ease in the top I cut the size 4. For the dress version, I'm thinking about sizing down to a 2 to have less ease in the waist. Has anyone successful sized down in a Fen dress for a closer fit?

I did struggle a little with the slippery fabric, and cutting out the bias strip for the neckline in particular was a pain in the ass. I don't have a cutting table, chalk or a rotary cutter so my method is to pin the pattern pieces directly to my fabric and cut them out on my living room rug with my old scissors that probably need to be sharpened. If I don't lose interest in sewing again, I'll definitely be looking into upgrading that process with some shiny new tools!

I didn't finish the seam allowances. I intended to zig-zag stitch them, but the fabric hated that idea and I didn't have enough room to do a clean finish. I plan to handwash it at least, which I'm hoping will slow down any fraying.

Here's to my first sewn garment in about three years!

Two Unexpected FOs

In the midst of my crazy work schedule, I somehow managed to carve out the time to finish two entirely selfish projects!

First up is Laurus by Dianna Walla, a most excellent colorwork hat. I was tapped to do a Valley Yarns Colrain review video at work (well, I was asked what yarn I would want to review and I chose Colrain) and needed to have a Colrain project on the needles for it. I wanted something simple that I could bang out fast and that used 2 or more colors to show off a fun color pairing. I'm obsessed with this sienna, clay, orangey-red color. It's the same I used in my Kitsunetsuki Cardigan sample! A pop of blue gave it just the right contrast. I'm getting a New England collegiate preppy vibe from this, though don't ask me why! These colors will be right at home in my fall wardrobe though, and Colrain is always a pleasure to work with.

And I finally finished a stagnant spinning project! Two events dovetailed to inspire me to get back to my wheel. The first was that while shooting the Colrain video at my house, Lindsey was looking at my stash and well, made me feel a little bashful about all that I have, especially the often-forgotten fiber. The second was that last weekend was the annual Webs Tent Sale. Saturday is the one day everyone is required to work, and it's also the day that local farmers and artists sell their wares in the parking lot as part of the Fleece Market. Did I want to buy fiber at the Fleece Market? Yes. Have I spun the fleece or the batt I bought at last year's Fleece Market? .....No! Before I can start spinning that fleece, I needed to clear my bobbin and this was half-spun.

It's a Frabjous Fibers Three Feet of Sheep pack, 70% BFL/30% Tussah Silk in the limited edition colorway Autumn Leaves. Originally I split all the bumps in half planning to do a 2-ply gradient spin, but a) got lazy when I finished the first half and b) forgot what order I had spun them in. Oops. So I called it as-is, and I have about 732 yards of a fingering to laceweight yarn here (mostly thinner, but some parts are fingering weight thickness.) I've been enjoying knitting with singles yarn lately anyway, and I think I'll experiment with the second half the fiber. Maybe learn to Navajo ply or something! I'm really excited to see how this knits up, but I'm forcing myself to finish some existing projects first before I can cast on...

Butter Mellow Cowl

New pattern time!

Photos by Lindsey Topham

Photos by Lindsey Topham

Months ago I decided to start designing more from my stash. I think my stash is a manageable size compared to some peoples', but to me it feels overwhelming at times. I have good intentions when I buy yarn and try hard not to go overboard, though inevitably there's always a great deal or a limited edition something-or-other that's much harder to resist. I pulled a single skein of The Plucky Knitter Plucky Feet in this great bright yellow out of my stash and set about trying to do it justice. Thus we have the Butter Mellow Cowl!

IMG_7966sm.jpg

I never considered myself a big fingering weight or lace knitter...until now. This project kicked off a stream of fingering weight projects that I'm still in the middle of! Usually fingering weight designs make me anxious or frustrate me because they take so long and seem so fussy. For whatever reason, I really zen'd out while knitting this and just enjoyed the process, no matter how long it took.

This is a shorter cowl, meant to act as more of a decorative accent to your ensemble than provide warmth in cold-weather. Since the length as shown only uses 300 yards, it's perfect for a luxury skein with less yardage than the traditional 400+ yards many fingering weight yarns are packaged as. If you've got plenty of yarn and want it loop it around twice, add repeats of the alternating lace panels until you've reached the length you prefer!

Check out the Butter Mellow Cowl on Ravelry here.

Hat Addict

Did you ever read this book as a kid, Caps for Sale?

Hats are like potato chips...or M&Ms...or other easily poppable snack foods. They're quick to knit, low-commitment, and a satisfying way to try a technique, style or color you don't want to commit to in a sweater. My coworkers and I were talking recently about how many hats we have. No matter how many we knit, there are still more hat patterns in our queue! I decided to photograph my hat collection today and I felt like the man in the illustration above when I pulled them out of their drawer.

This & successive photos taken with my Nikon D3200

This & successive photos taken with my Nikon D3200

I decided to take things one step further and lay them out in order from oldest to newest, starting at the top row and moving from left to right. Let's meet the gang!

Top Row, L to R

  • Gretel by Ysolda Teague in Malabrigo Worsted: Ysolda was one of the first designers I found online once I learned how to knit, and Malabrigo was the first 'cult' yarn I'd ever read about. I hadn't discovered any local yarn stores at that point, so I ordered it from the internet not realizing how the hand-dyed color would look knit up. I was also too lazy to block it over a plate for a beret shape like Ysolda suggests, so it's a sad, awkward beanie instead.
  • Grace Lace Beret by Loop Knits in Adrienne Vittadini Martina (I think): I found this yarn in the warehouse at Webs. Like Gretel, I failed to block it properly so it's a weird and unflattering shape.
  • Acorns by Melissa LaBarre in Madelinetosh Vintage: I made this right after I started working at Webs. Melissa worked there at the time and I remember being awestruck that I knew a famous designer! She gifted me this pattern which I thought was so cool of her. This was at the beginning of my Madelinetosh craze. I had just bought enough Tosh DK & Tosh Vintage for two sweater projects but wanted a smaller Tosh project right away. I purposely didn't block it because I love the nubbly texture.
  • Brambles Beret by Amanda Muscha in Berroco Ultra Alpaca held with Rowan Kidsilk Haze: I started noticing my coworkers knitting 'normal' yarns held together with Kidsilk Haze and I loved the soft halo effect. I chose my favorite shade of pea green!

First Middle Row, L to R

  • Ida's Kitchen by Kirsten Kapur in Madelinetosh Sport: I had started to get really into Ravelry at this point, and joined a Madelinetosh group. We wound up doing a swap for this hat where each person bought a skein of sport, broke it up into mini skeins and sent it to other people in the group. I got to try all kinds of colors I had never seen in person before!
  • Little Whiskers Hat by Kirsten Hipsky in Valley Yarns Greenwich: My very first pompom :) This hat got famous in the Sh*t Knitters Say video!
  • Free Cecily Hat by Emma Welford in Cascade 220 Sport: Ah, the beginnings of my design career. I was so proud of myself for making up my own cable panel for that hat.
  • Striated by Emma Welford in Malabrigo Chunky: Another early design. This was the first pattern that I worked with Lindsey on (my current & forever, ride or die photographer), and the first time I did my own pattern layout. I've tweaked my layout style a little since then but it's still the same basic format!

Second Middle Row, L to R

  • Wolfbait by Alex Tinsley in Schachenmayr Bravo Big Color: Free yarn, free pattern, enough said. Alex looked SO COOL in her hat photos but I looked SO DUMB wearing this myself, so I don't actually wear it.
  • Rhinebeck Bus Hat in Berroco Lodge: I knit this on the bus to Rhinebeck one year and made the pattern up as I went. I wear this one a ton, even though it's plain. The color goes with a lot of my wardrobe and the amount of slouch is perfect.
  • Goshen by Amanda Keep Williams in Berroco Brio: Technically I did not knit this exact hat. My best friend Kerry and I did a hat swap. She knit this Goshen for me, and I knit her Goshen in the colorway of choice, then we swapped! But since I don't have a photo of her hat, this is the closest we're going to get.
  • Tamborim by Emma Welford in Gynx Merino DK: From my yarn & pattern club collaboration with Gynx Yarns. I love Laura's yarns, they're so great to work with. My only regret on this one is that I didn't do a bigger pompom. Maybe some day I will make a new one for it!

Bottom Row, L to R

  • Random made-up hat in handspun from Etsy: I bought this handspun before I learned how to spin. I tried making legwarmers from it and that didn't work out. I frogged and made this hat, but I was so impatient I didn't really do a proper gauge swatch and the hat got super big when I blocked it. I need to rip this out, un-kink the yarn and give it the respect it deserves!
  • Shock Star Slouch by Emma Welford in Spun Right Round Squish DK: I love this hat. One of my current favorites.
  • Equal Measure (hat only) by Emma Welford in Anzula For Better or Worsted: Sensing a trend in my hat making as of late? All designs!
  • Fidra by Gudrun Johnston in Valley Yarns Valley Superwash Bulky: So this was a not-on-purpose knit. We were doing a Superwash Bulky review video at work and wanted a hat to be worn in it, but there weren't any existing store samples. I volunteered to make Fidra since I secretly wanted to make it, but needed an excuse! I know, boo hoo hoo, life is hard. Forced to knit ;)

Of course, there are more hats I've knit over the years that aren't pictured. My first ever hats, hats I've given as gifts, or hats I've lost in some box somewhere and forgot about. And I know my little hat family will get bigger...there are always more hats to knit!

2015 FOs

As a designer, knitting something from a pattern you did not design is affectionately termed as knitting "other people's patterns." Depending on how much one designs, those OPPs can be few and far between, or more frequent. Andrea Rangel calls it "professional development" and I like that term too.

Here are my two resulting piece of professional development from 2015! If I knit anything else last year that wasn't for work, I have subsequently blocked it out of my mind. I tried to knit a Chuck but failed disastrously and need to start all over again.

My one successful knitting FO was a riff on Purl Bee's Short Row Sweater.

DSC_0385.jpg

I followed peoplecake's instructions for modifying the back to match the front, rather than have the crossover back in the original pattern. Like her, I knit the smaller size and chose the same yarn, Madelinetosh Tosh Sport--seen here in the Spectrum colorway which I adore. Now that it's winter I layer this over long-sleeved tops as shown but I can't wait for summer when I can wear it with a tank top and a cute skirt!

My crochet FO of the year was the Sunday Shawl by Alia Bland.

I used Berroco Folio because I love the color range of that yarn and thought all those delicious sorbet colors should be used in one project! As a bonus, I have enough leftover that I think I can make a striped sweater.

I don't consider myself a very skilled crocheter--I have to remind myself what the different stitches are if I don't crochet for awhile, for example--but I found this pretty easy even though I had never worked any of those border stitches before. It's warm but lightweight and adds great color to a monochrome outfit.

I would like to finish one knitting and one crochet project from OPP in 2016, so that's my goal. I've had the yarn and pattern for Tinder for a loooong time....let's get knitting!

Recent Customer FOs

One of the more fun parts of being a designer is getting to see other people's versions of my designs. (What, you thought I was going to say the math part was the fun part?) When I worked the floor at Webs, I always enjoyed seeing people's planning stages of their next project--what yarn they picked out, what modifications they planned to make--and then viewing the end result if they came back to the store wearing their newly finished work. The internet is a wonderful thing though, because now I get to have that same experience with my customers without having to ever leave my house! Here are some fabulous and recently finished FOs I wanted to share.

Craftylikeasheep modified my Shock Star Slouch by working the brim in a solid coordinating color and adding some sparkly beads for the magpie in us all!

Not only do these socks coordinate spectacularly with the background, but Kerppa chose a great variegated green colorway for her version of The Dauphine's Stockings which creates a totally different effect than the colors in my sample.

A fellow designer who participated in this year's Gift-Along, anneh asked if I would be willing to gift her a copy of my Brooklyn Bridge Mitts so she could make them as one of her GAL KAL projects. To my surprise, she turned them into a pair of full mittens--a clever and easy modification!

Tantu's thick and wooly Ornate Greaves are the perfect extra layer for outdoor activities. Love that she photographed them with her bike to really set the scene.

A pattern like my Dark Rainbow Sweater is really exciting to see knit up by others, because I get a chance to live vicariously through other color combinations! In this case, I got to see how andyrox's chosen contrast color evolved in the triangle intarsia sections.

If you want me to see your FOs, make sure to post them to Ravelry or you can post them to Instagram and either use the hashtag #emmawelford or mention my username in the caption (@emmawelford.) I always look forward to seeing what you've created!

Welcome Spring (and Galicia!)

Back in January Manos del Uruguay released their spring line of patterns. I contributed Galicia, a lightweight pullover, but it just felt wrong to taunt you with warm-weather goodness while still embroiled in the depths of winter! Well, the snow is (mostly) melted 'round these parts and I feel like it's finally time to turn our knitting attentions to greener pastures.

galiciaDressmaker's photos by Fairmount Fibers Ltd

Galicia is knit in Serena, a really nice alpaca and cotton blend which is smooth, drapey, and just perfect for lighterweight garments. I decided to try out a new construction method that I've knit before on personal garments but not designed in until now. You start by working the upper back flat from the neck down to the armholes, then those stitches are set aside and the front shoulders are picked up from your cast on edge so you can work the chest from the neckline down to the armholes. From there, the halves are joined and the body is worked downwards in the round. Stitches for the sleeves are picked up to work a short row sleeve cap before continuing knitting them downwards in the round. In a nutshell: seamless, knit flat AND in the round, and lots of fun!

Just like the Holla Back Tank (how I've come full circle!), the back steals the show here with a lace panel and garter stitch upper back section. The front has a slight A-line shape thanks to evenly placed increases, to keep the fit breezy and relaxing. Here you can see a close-up shot of the front in the official pattern photos, and a casual one of me that shows how it looks on a person.

galicia collage

I think it would look great in Natural paired with denim or patterned shorts, or maybe Green Tea--one of my favorite Serena shades! A short sleeved or sleeveless version would also be killer for the intrepid modders among us. Any which way they turn out, I can't wait to see more versions popping up.

Cats Cats Cats

As promised, the second sweater from the caboose photo shoot: Cables 'n Cats!

IMG_1215 (2)smPhotos by Lindsey Topham

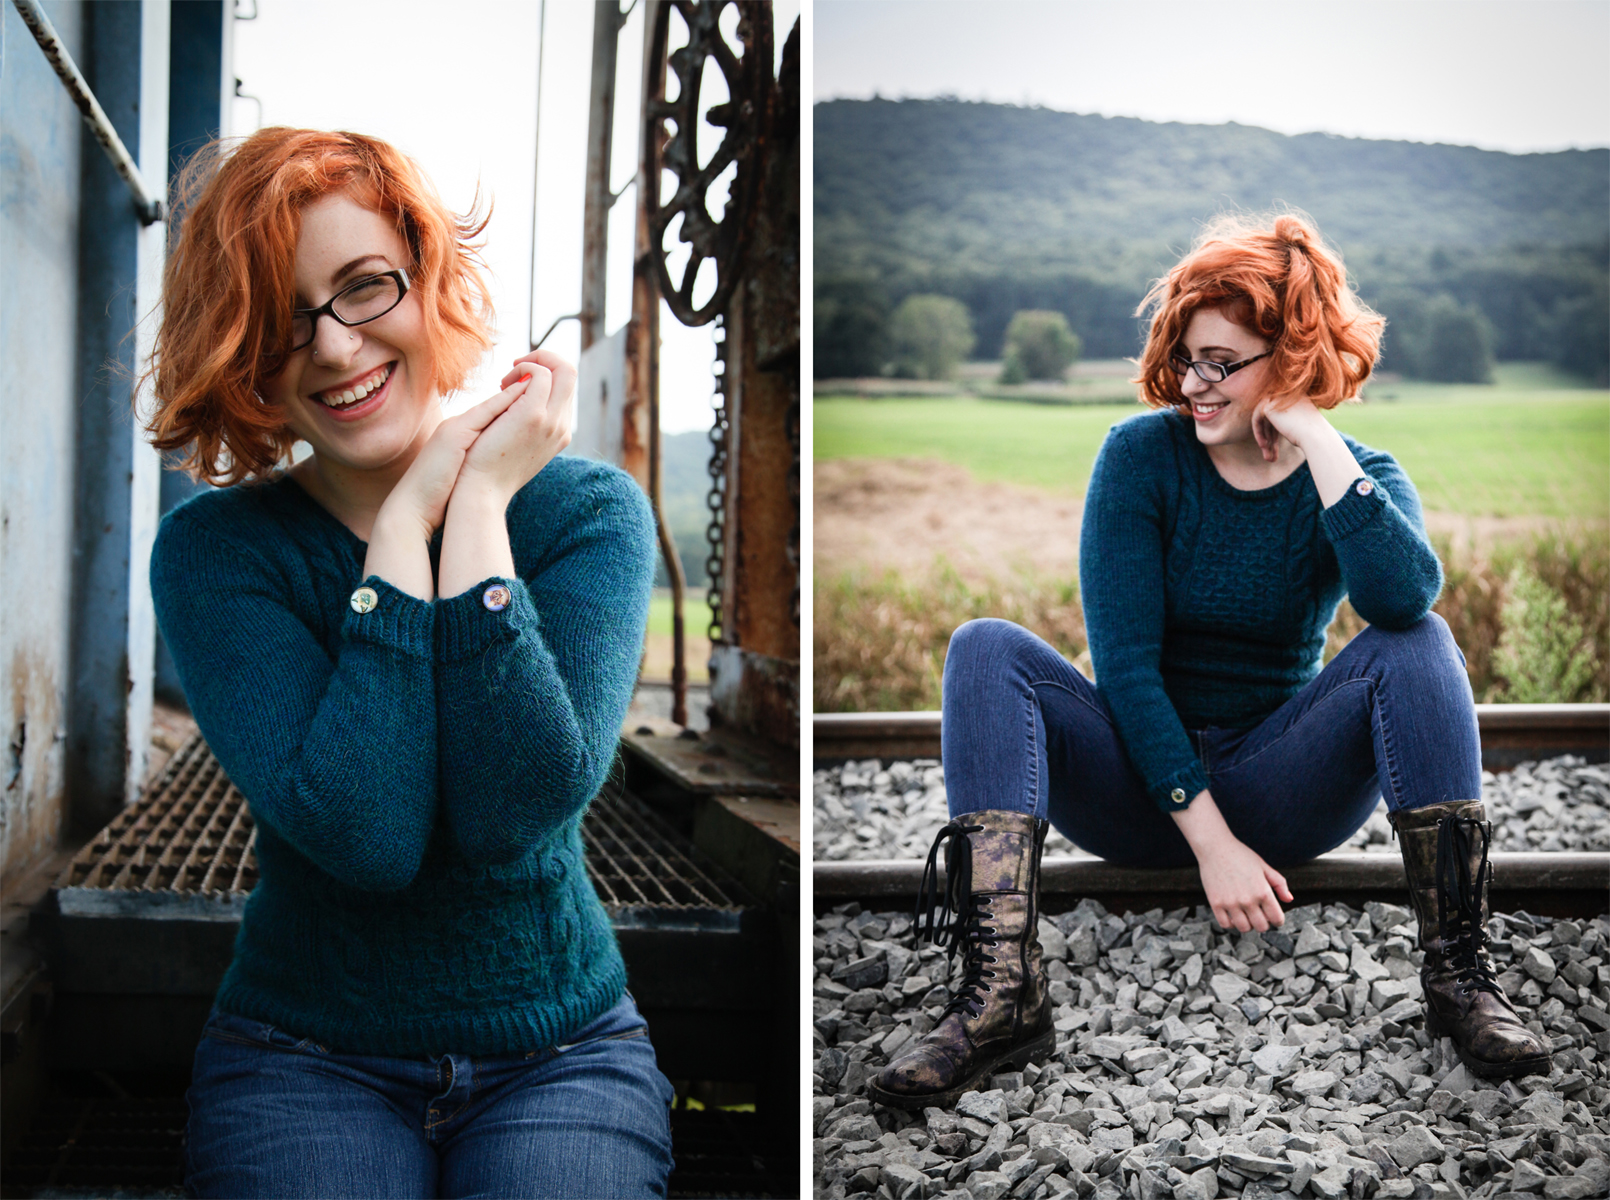
This sweater has no particular inspiration, which is how I work sometimes. I was playing around with juxtaposing various cable and texture patterns together and fell upon this combination which I really liked. It's a classic, simple shape overall but very flattering thanks to the waist shaping and the large cables which sit at a princess seam orientation. And then you turn around to reveal....cat buttons!

IMG_1353smestThe sleeve cuffs are also buttoned and each button features a different kitty! I love this style of buttons--I used them in my Brooklyn Bridge Mitts, and I have robot buttons in my stash waiting for the perfect sweater.

blogThe construction is a little interesting towards the end, but nothing crazy complicated. The body is worked in the round until the armholes, then the sleeves are worked separately (also in the round) and joined together with the body to work the yoke in one piece....at first! Once stitches are bound off at the center back for the button placket, the yoke is worked back and forth in rows. Then as the neckline shaping begins, you work back and forth on one side of the body at a time (going from the front neck across the shoulder to the center back.)

You can snag Cables 'n Cats on Ravelry now for $7.00.

Let's Get Stripey

I recently released a new cardigan pattern....and never posted about it here. Oops! In case you missed it on Ravelry, this is Stripe Quartet!

IMG_1598smallestAll photos by Lindsey Topham

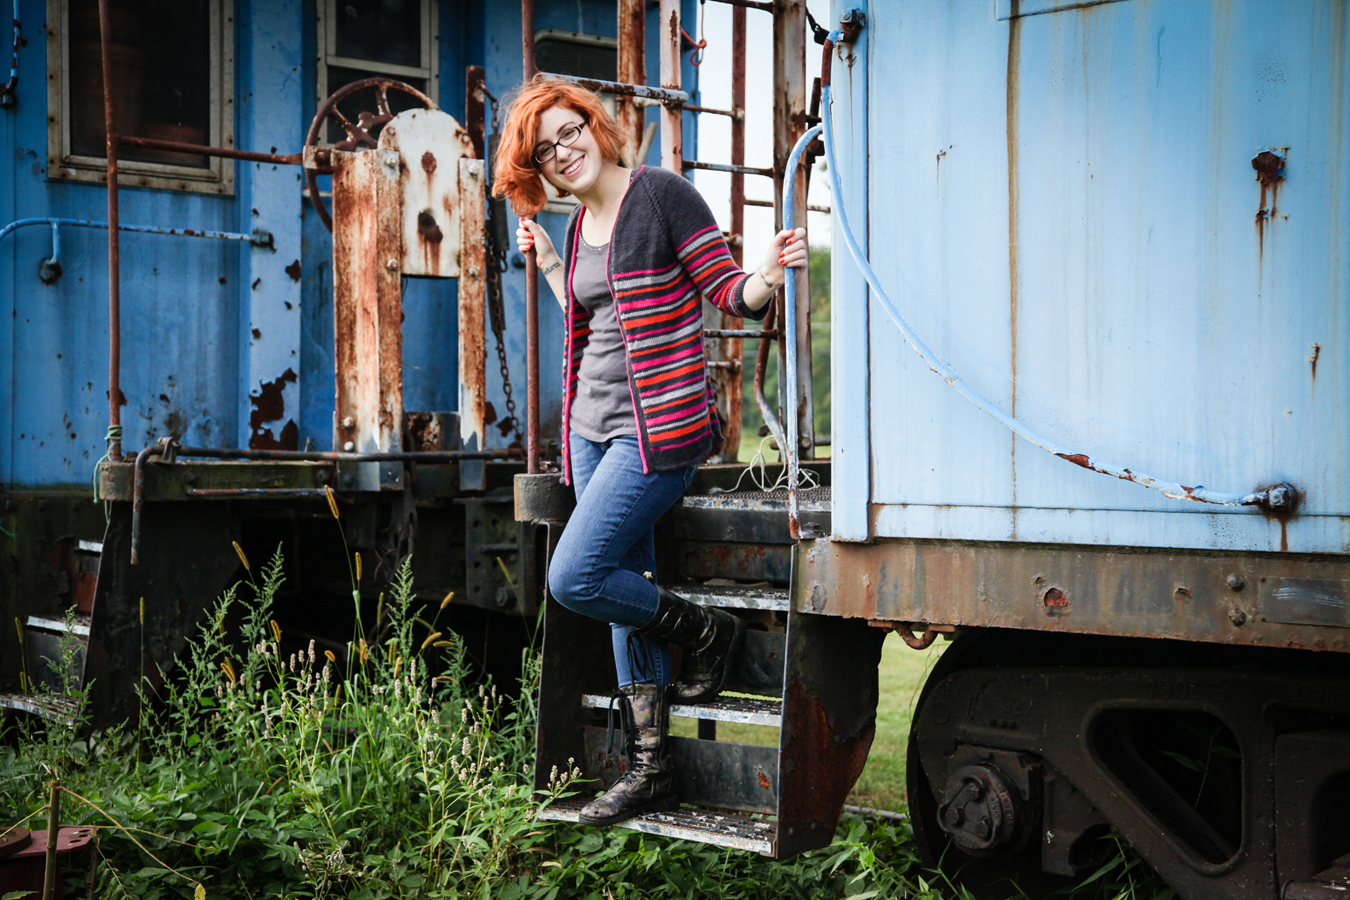
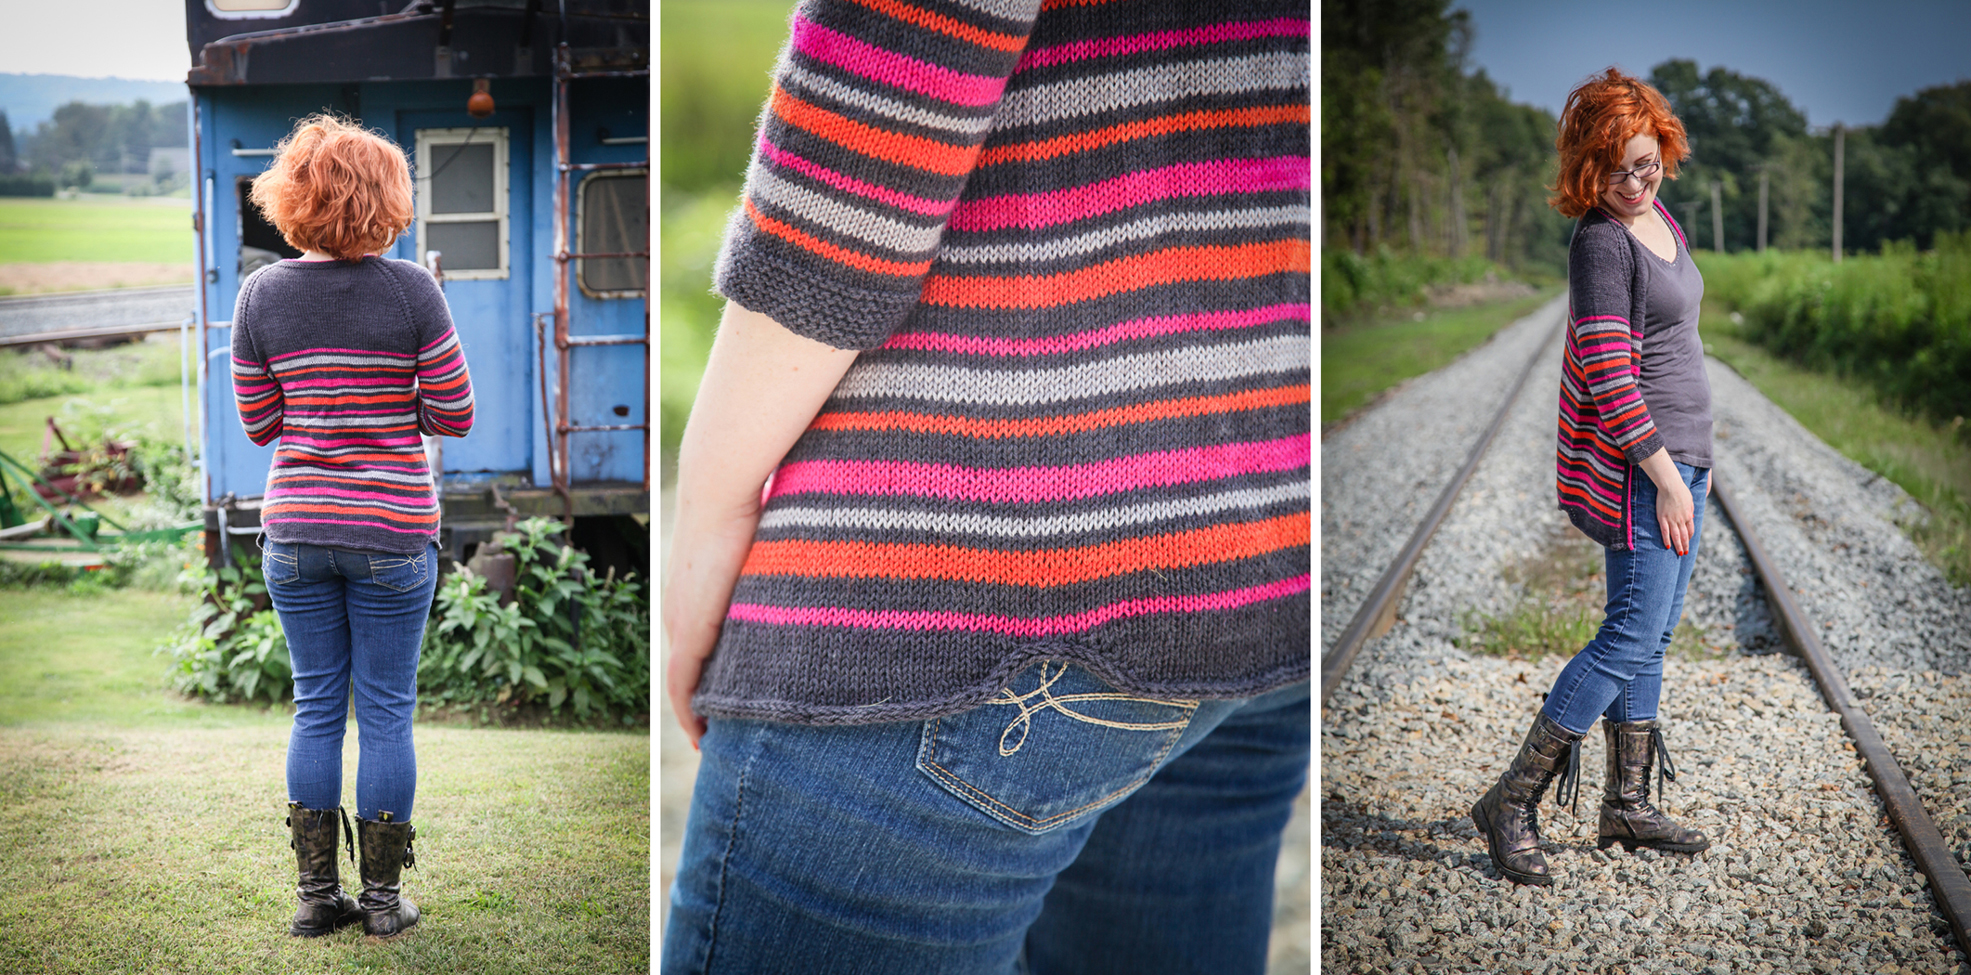
Knit in four colors of the gorgeous Baah Aspen, Stripe Quartet is a top-down raglan cardigan that lets the stripes take center stage. There are a few special touches, like eyelet raglan increases and a curved hem finished with an I-cord bind off.

blog

I was super excited to finally use this location! I am constantly making note of potential photoshoot locations and I had mentally bookmarked this one ages ago. These amazing blue cabooses reside just behind Green Valley Produce, a farm stand in Deerfield, MA. The owner Jon was nice enough to allow us to shoot there and I have another sweater coming soon that we took photos of here as well.

I'm a huge fan of orange and pairing it with hot pink and greys was a dream color palette for me. What quartet of colors would you get stripey with?

Pole Antics

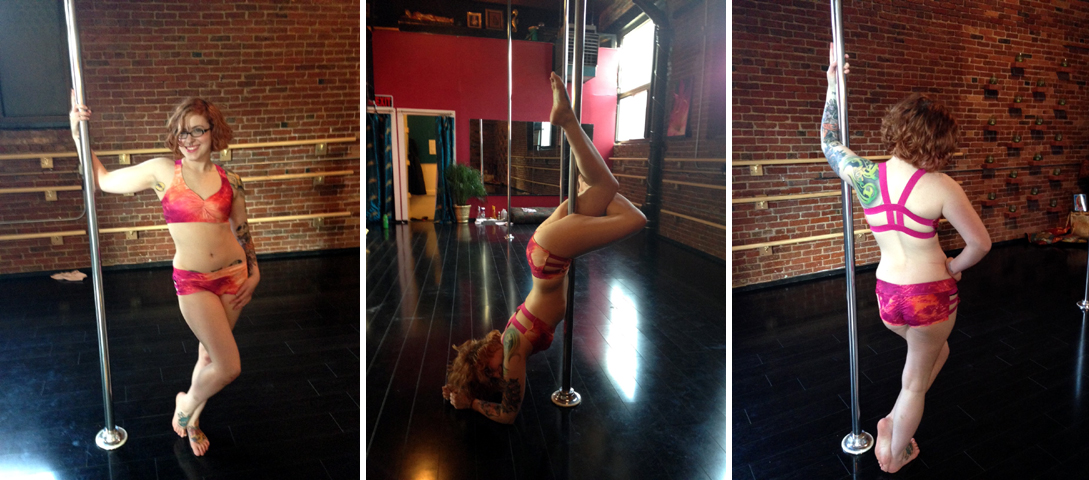
For those of you new to this blog, I pole dance. I'm not a stripper, meaning I don't pole dance to make money and I don't remove articles of clothing while dancing with the intent of becoming partially or fully naked. (Some lovely acts involve costume changes while dancing, hence the 'naked' qualifier at the end.) That aside, there are plenty of similarities between what strippers do and what I do, and it would do them a huge disservice to pretend that I am 'better' than they are--because I'm not. Pole dancing in any situation is an extremely athletic act, and many modern moves were born in strip clubs rather than being adopted from Chinese pole or mallakhamba. I have nothing but respect for strippers--hanging from one knee is difficult enough, let alone having to do so while wearing 6" heels and possessing the customer service skills of a waitress or hospitality industry person! Anyways, that's not the point of this post but I felt it needed to be said. I understand the impression most people have of pole dancing though and I'm not offended if you are uncomfortable with it--feel free to skip my pole posts! I'm performing in a Halloween showcase in a week, alongside many other lovely ladies and I just had to go full throttle...by making my own costume! Today was our dress rehearsal so I snagged some photos afterwards.

pole costumeArmed with this great printed spandex from Spandex House, my favorite source for stretch fabrics, I immediately went back to my comfort zone of sewing--aka, making shit up. There are a few practical considerations for making a pole costume, primarily in terms of coverage. Obviously I wanted something secure enough that it would stay on as I spin and invert, but you also need a certain amount of skin exposed to ensure better contact with the pole. Your knees and inner thighs are used while climbing and sitting on the pole, respectively, while your waist needs to be bare for certain inverts. In short, sex appeal is not the only reason why pole dancers wear what they do!

I used an existing pair of booty shorts as my 'pattern' for the proportions and shape of these ones, but added in the open side panels with elastic strapping. You can't see it in these photos but the butt features that scrunch butt ruching that is very flattering. ;) The top was harder since this was my first time using soft bra cups and I found them really hard to place properly in the lining--mostly because the strappiness of the top meant I wasn't able to really try it on until it was fully assembled, and I needed to put the lining in before then! Luckily, I have a small chest so I didn't need anything more than the cups and a thick elastic bottom band to keep everything supported. The center of the bust is also gathered to match the shorts and create a more flattering neckline for my shape. And that strappy back (or backless)....perfection! Exactly what I was going for, and incredibly comfortable it turns out.

Now I just need to practice my full bracket grip until Friday!

Different Kind of DIY: Garage Gym Makeover

In June, Mark and I undertook the massive task of converting our not-a-real-garage into a garage gym!

beforeBefore: outside and in

"Not-a-real-garage" because it had no door and that opening isn't large enough to fit a car into, so it mostly became the repository for random stuff. (Obviously these before pictures are after it was cleaned out of junk.) We rent, and this structure was already here and wired, which was great because we didn't have to mess with that--only needed to get our landlord's permission!

The first step was to prep for a poured concrete floor. Since Mark has a contractor's license and this was his baby, he did most of the labor though I helped out when I could. It was his first time working with concrete but luckily, his father used to work as a mason so in addition to watching lots of This Old House videos, we had an expert who advised us on the prep and then helped out the day of the pour. Super win! We rented a plate compactor for the day to tamp down the dirt floor in preparation, and to press down some gravel that we used to level out the floor. Somehow we managed to fit it into the backseat of my Honda Civic--the rental guy was very impressed with that trick. Then Mark laid down the concrete mesh, which is just thick wire mesh that covers the floor to make the concrete stronger. (I was able to help a little with this part, ha.) Seeing as we had an opening in our structure and weren't pouring a closed off foundation, we had to place boards across the opening and shore them up with little props so the concrete wouldn't spill out on to the lawn.

We contracted a local company to deliver the concrete on a Saturday morning and the truck was HUGE! It's one thing to pass one on the highway and quite another to see one dominating your driveway:
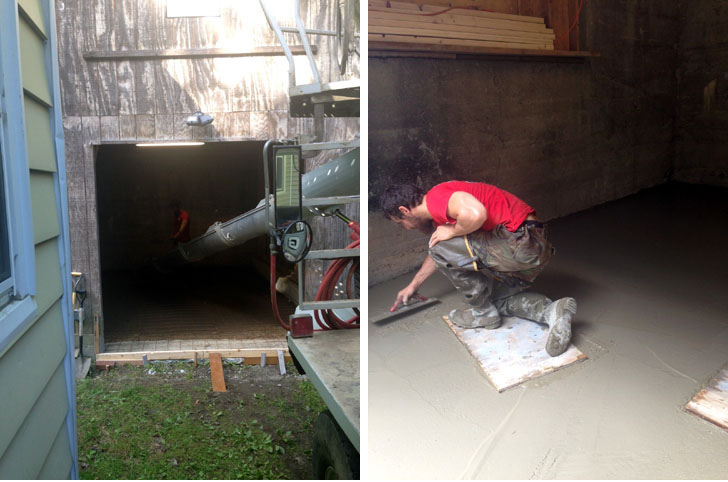
duringDuring: concrete delivery and Mark hand float finishing the surface

Once the concrete is poured and spread to all the areas you are covering, it comes time to float the surface! Floating=making the top nice and smooth, leveling and filling in any gaps, basically creating the look of the finished floor. (The concrete delivery guy had left by this point, they don't help with anything past dumping the concrete.) We rented a bull float, which kind of looks like a large metal Swiffer without a pad on it, LOL, but it was in poor condition and was messing up the surface rather than smoothing it. Mark's dad to the rescue! He showed us how you can finish it entirely by hand, using boards to kneel on to avoid sinking into the concrete, though we did have to wait a little bit after it was poured for the concrete to reach this stage to make the support possible. You can't wait too long to float the surface or the concrete becomes unworkable and the 'cream' (the moisture that rises to the top when you float it) is no longer present, and that's needed to smooth things over. Professional concrete contractors have power float machines which can get that super smooth and shiny finish seen in stores, but we weren't about to get into that so our floor isn't perfectly smooth (though entirely useable). Mark and I also put our handprints into one corner before the concrete dried :)

After the floor had cured for a few days, Mark began framing the opening so we could put in a door.
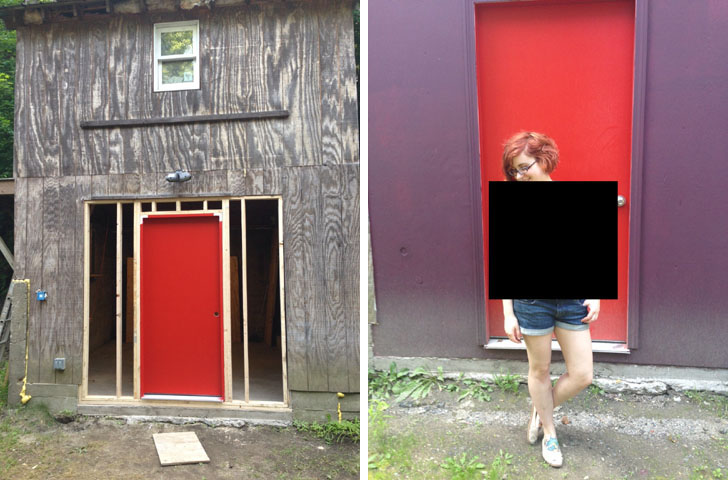
afterDuring/after: framing and the final outside (I'm wearing an unpublished sweater design, hence the censorship!)

We painted our door red because, why not? The wall we built to close the opening is painted brown, but it pulls more purple in some light which is why it looks purpe-ly above. Currently the rest of the structure is unpainted, though we'd like to paint the rest of it someday and add gutters, if we can come to an agreement with our landlord to reduce rent in exchange for those labors.

So what's inside?

photo 4After: the finished inside!

All the workout goodies! We have:

  • power rack with T-bar row attachment, on the lifting platform Mark built
  • Olympic bar and 500 lbs of plates (that's including the bar's weight)
  • adjustable weight bench
  • two mirrors
  • ballet barre for stretching
  • heavy bag
  • full set of dumbbells and 2 kettlebells, ab wheel, wrist/ankle weights
  • exercise ball, pull-up bands and resistance bands
  • yoga mats and blocks
  • two pull-up bars (one is part of the rack, the other is separate)
  • gymnast rings

It's incredible to have this at our disposal 24/7, only a few feet from our house. Mark lifts almost daily, since he's currently following 5/3/1 (a powerlifting program). I use the gym more sporadically because I'm attending fabric and pole classes every week, but it's great to have the freedom to pop in when I want a quick workout or have the urge to try something new. Currently my favorite use of it is to do some short lifting sets, either squats or deadlifts, and then do pull-ups and aerial conditioning on the rings. I like to invert on them and cycle through different positions (split, pencil, pike) and lower myself down really slow. My goal is to be able to do skin the cat!

If you're local and want to workout with us...let's do it!

Something Magical

Last year a sub call came out that I instantly squealed over. I was already swimming in work and did not need another project added to my pile--but this was a theme I could not resist. I have always been a big reader with a special attachment to fantasy, mythology and science fiction. One of my favorite books as a child was D'Aulaires' Book of Greek Myths, a book I loved so much that I covered the paper dust-jacket with contact paper so it wouldn't become torn. (I still have that book and it sits on the upstairs hallway bookshelf.) I wasn't limited to Greek mythology though and devoured books based upon legends and fairy tales from all cultures. As an adult, my single favorite book not from a series is Enchantment by Orson Scott Card, which mixes Russian fairy tales with the modern world. So when the call was released for Enchanted Knits...I couldn't help myself. It was my dream call. comboKitsunetsuki is a foxy red cardigan inspired by the Japanese mythology of the kitsune. While kitsune is the Japanese word for fox, in this context it refers to the fox spirits who frequently appear in their stories. Kitsune possess the ability to shapeshift between fox and human forms, often taking the form of a beautiful young woman. They can act as a trickster figure (akin to the wily coyote of Native American tales), have romantic dalliances with humans, or offer wisdom. Kitsunetsuki refers to the state of being possessed by a kitsune's spirit.

I wanted to create a garment that was flattering, wearable and inspired by the myth rather than being too obvious. The front features a traveling cable across the chest which imitates the shape of a fox head, and also serves the purpose of demarcation between the reverse stockinette body and the stockinette yoke. The simple front allows the large unique cable on the back to stand out. Each individual cable is meant to represent one of the kitsune's tails, as the stories hold that older and wiser kitsune are capable of earning more tails, and they join together to form a fox tail shape.

I have to admit the extent of my nerdery...my cats are named Kitsune and Tsuki.

2 kittiesKitsune (left) was the first, and I named her as such because she's gingery and has a big fluffy fox tail and as it turned out, is wily, manipulative and kind of a bitch. But I love her with all my heart because she's unabashedly herself, no holding back. As I like to joke, "Like mother like daughter!" Tsuki (right) came second, and I wanted them to have coordinating names because I am a dork. I tossed around a few other ideas based on Japanese words/mythology but none of them sounded pretty.

If you're interested in reading more about kitsune, I recommend the following:

  • Foxwife by Hiromo Goto, a short story found in The Fairy Reel
  • The Fox Wife by Ellen Steiber, a short story found in Ruby Slippers, Golden Tears
  • Strange Tales from a Chinese Studio by Pu Songling - technically this is Chinese, not Japanese, and as such the relevant stories are about huli jing. There are many similarities though, and I studied this particular book as part of my focus in Chinese History when I was in college.

Happy knitting AND happy reading!

Adventures in Wonderland

IMG_5376smAll photos in this post by Lindsey Topham unless stated otherwise

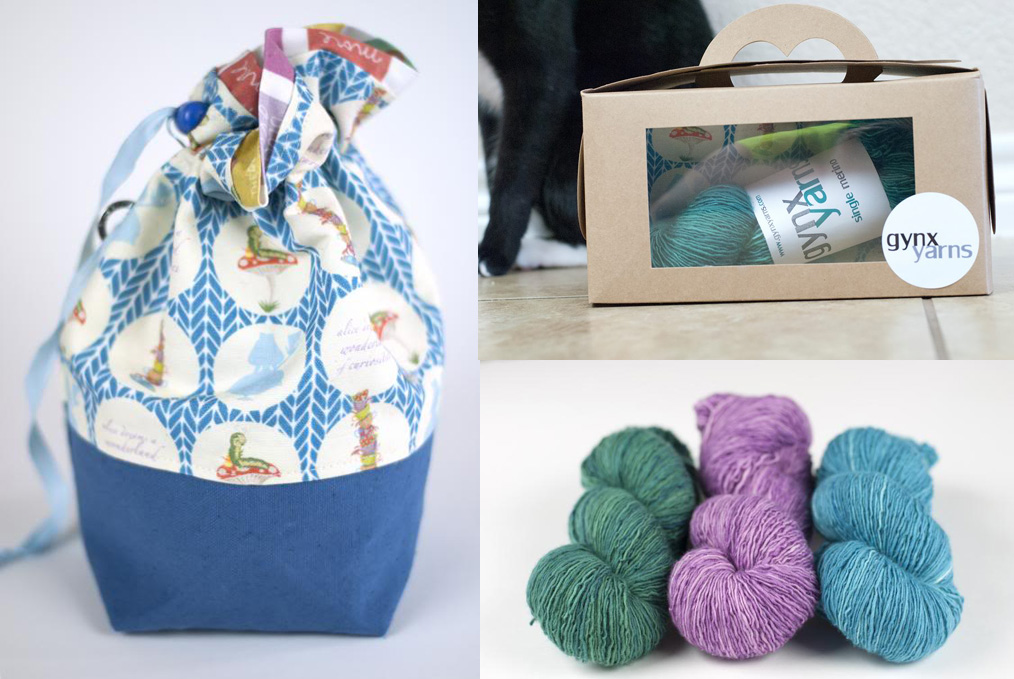
I've once again teamed up with Gynx Yarns to bring you an amazing accessory collaboration! Meet Advice From a Caterpillar, my contribution to Laura's Alice in Wonderland themed kit she is debuting at SSK this month.

Laura contacted me asking if I could whip up a one or two skein accessory design to fit her planned theme and of course I had to say yes. She is always a joy to work with--not only is the yarn beautiful, but she trusts me as a designer and lets my imagination run wild. Laura dyed up three exclusive Wonderland inspired colorways just for the kits (my shawl uses 'Wonderland') and asked Little Skein in the Big Wool to contribute a matching project bag. Take a look!

kit collagePhotos by Gynx Yarns - yarn colors from L to R are Wonderland, Cheshire Cat & Caterpillar

I happen to have one of those project bags myself (advance perks y'all!) and the construction is FABULOUS. Really sturdy and the fabric is adorable.

In case you couldn't guess it from the name, my shawlette drew inspiration from the Caterpillar. I have to admit, I am a bigger fan of Through the Looking Glass but I wanted to go with the original book for this one. I was imagining the cables as wriggly caterpillars at first, then I realized the cables' transition to ribbing and back again was an apt metaphor for metamorphosis. Caterpillar to butterfly, Alice to Big and Little Versions of Herself, and so on. Pretend you're an art student and fill in with your long-reaching explanation of choice.

blog collageAs luck would have it, this turned out to be the most perfect photoshoot yet! Lighting, location, styling--everything was on point to create a magical mood.

If you're not attending SSK, look for kits/preorders to appear in the Gynx Etsy Shop around July 22nd. I'll make an announcement when the pattern is available for individual sale. Til then, beware of the Jabberwocky, eh?

Long Overdue

Some of the best things take forever. Over a year later...I finally finished my Sugar Maple! photo 2SO. GOOD! The pattern is by Carina Spencer and is genius in its simplicity. I obviously don't have much free time to knit other designer's patterns anymore so I really relish it when I do. It's a vacation, but I learn a ton at the same time studying how they write and format their patterns, seeing how different we brain things, etc. The yarn is a double gradient maki of Play at Life Fiber Arts Scrumpet in the Silky Cocoon colorway. First of all, having only two ends to weave in=amazing. Oh I'm sorry--I should have said first of all, DAT GRADIENT!

1I was unsure on how this style would look on me at first, since I prefer fitted clothing and this has a bit of a swingy A-line shape. Of course, no need to worry as it's flattering and wearable! My only changes were to work it at a slightly different gauge (laziness) and I knit regular 1x1 ribbing for the edges instead of twisted ribbing (not reading properly, then laziness.)

Summer of 2014 is officially on, popping and stylish!

Birthday Hats

Sometimes, even when you're crazy busy (like "I probably shouldn't sleep for the next month" kind of busy)...you can manage to make something for people you love. I hinted at it on Instagram with this picture, but I made each of my parents hats for their birthdays this year. It's been a few years since they got anything handknit (selfish knitter for life, yo!) and I figured it was time once more. My mom's was at the end of February, so she already got her version of my Tamborim pattern because she admired mine at Christmas so much. Hers is sans pom-pom and the length is slightly shorter. My dad's birthday is today--hopefully you get your hat in the mail before you see this blog post, Papa!--and for him I decided to improvise.

papahatcollagePlease ignore my terrible lighting and bad self-photography skills.

I used the brim construction from my Free Cecily Hat, but worked it for longer so he has a nice thick brim to cover his ears when walking, hiking or cross-country skiing. The body of the hat is an oversized garter rib pattern that I "made up" but probably already exists: Knit all sts on Rounds 1 & 2, *k2p2* on Rounds 3 & 4. I winged the crown decreases and tried to keep the ribbing intact as it narrowed. Yarn is Dream in Color Classy, possibly in Cloud Jungle--I had it in my stash without the label.

I'm really pleased with the end result! Sometimes it's nice to create without writing everything down with plans to publish it, and I like knowing that my papa now has a one-of-a-kind creation.

P.S. My birthday is at the end of the month and I would not say no to a hat. #jussayin

It's Electric!

*cue The Electric Slide and memories of dancing to it in middle-school gym class* Ahem! Now that little bit of reminiscing is out of the way, I bring you: Elektrocute!

IMG_7337smAll photos by Lindsey Topham

Elektrocute is a graphic two-color cowl featuring a whole mess o' patterns! See: gradient transitions, zig-zags, and the cutest widdle lightening bolts ever. You won't get bored knitting or wearing this one, and it's sure to make you stand out from the crowd.

blogI'm sporting the longer 44" length (which can be worn open or doubled over) while Mary rocks the close-fitting 28" length. Both sizes take less than 2 skeins (one of each color) of Madelinetosh Pashmina. I've had Pashmina in my stash for over a year now but this is my first time using it--for shame! I can't think of a better luxury than treating yourself to this deliciously scrumptious yarn and then wrapping it around your neck. Not to mention the endless color combinations...

I wanted to try something a little different for this photo shoot, which is how we wound up with shots like this:

IMG_7294smI always enjoy starting my day with picking leaves out of my hair before work, don't you?

You can snag Elektrocute on Ravelry now.

An Army of Heliopaths

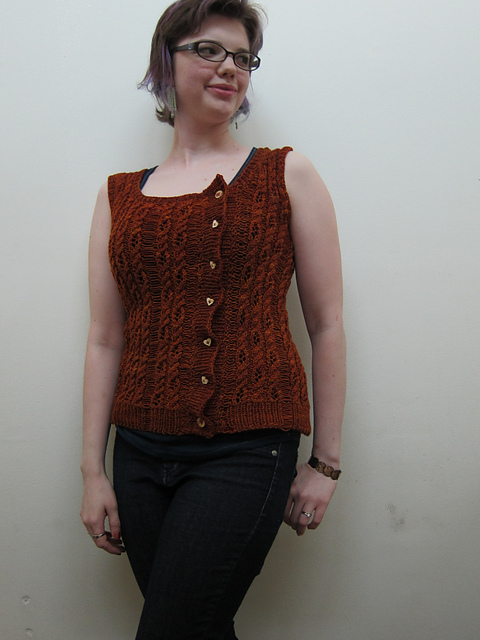
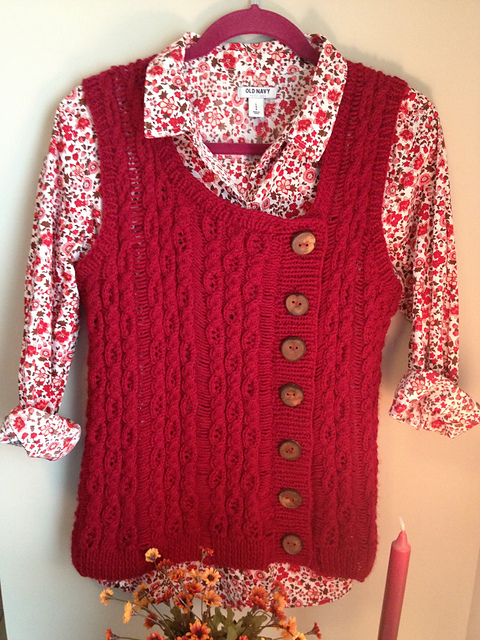
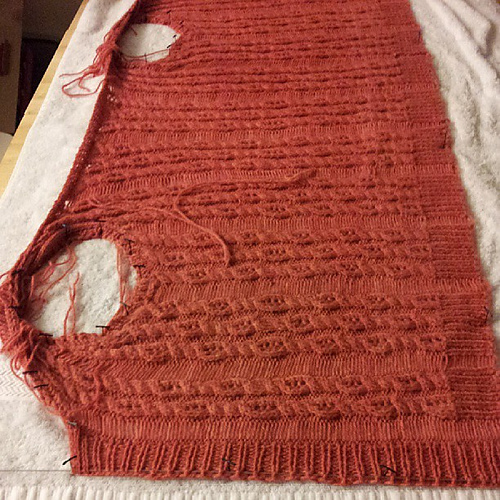
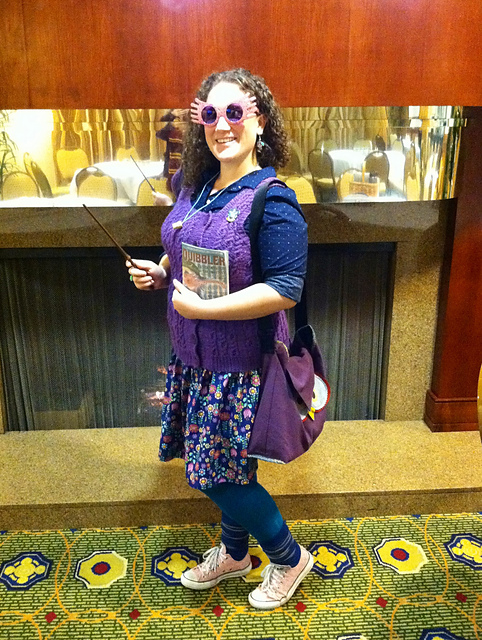
My Heliopath Vest pattern has over 1000 favorites on Ravelry--can I get a WOO-HOO?! Seriously, through the moon on this one. Putting a design out there is simultaneously exciting and scary, because what if no one likes something you labored over? (And cried over, and swore over...depending on the design!) This one is especially dear to my heart because of the Harry Potter connection, so I am super duper beyond thrilled that knitters are in love with Luna just as much as I am.

Without much more ado, here is a small sampling of the gorgeous Heliopath FOs that have been popping up!

heliopath1Krista-lu chose variegated yarn for a bold statement! These colors scream fall and I think the buttons are that perfect touch of bookish British classic style.

heliopath5Plucky Knitter yarn + a dynamite gal = thearensolo in her contribution! Great fit, and crazy adorable buttons (click through to her project page for a close-up!)

heliopath4I LOVE how this floral print shirt looks with Nanaelliot's flashy red Heliopath. I love button-ups but own zero, clearly I need to remedy this stat! (Side note: I never know whether to say 'button-up' or 'button-down' when referring to these shirts. Which is correct?!)

heliopath3OhTheBether even made her vest look stunning as it blocked! I'm a fall colors gal so I dig this rusty orange tone. Plus Swans Island yarn <3.

heliopath2And THAT? That my friends is Kirbalicious' vest seen here as part of her Loony Lovegood Halloween costume! She even has an accurate Quibbler in her hand, what detail!

Round of applause to these ladies and all the other Heliopath knitters out there--I really appreciate your support and always look forward to seeing your photos. Hope that more of you join us soon! After all, I'm going to need an army by my side when we finally decide the time is ripe to expose the Rotfang Conspiracy...

Handmade Holidays

So I'm a little late on this one--sorry! Things have been crazy over here, both in the designing and personal sense. Here's a quick round-up of the few handmade gifts I made this past holiday season.

A pair of Corseted Mitts for my little sister, in Dream in Color Classy.

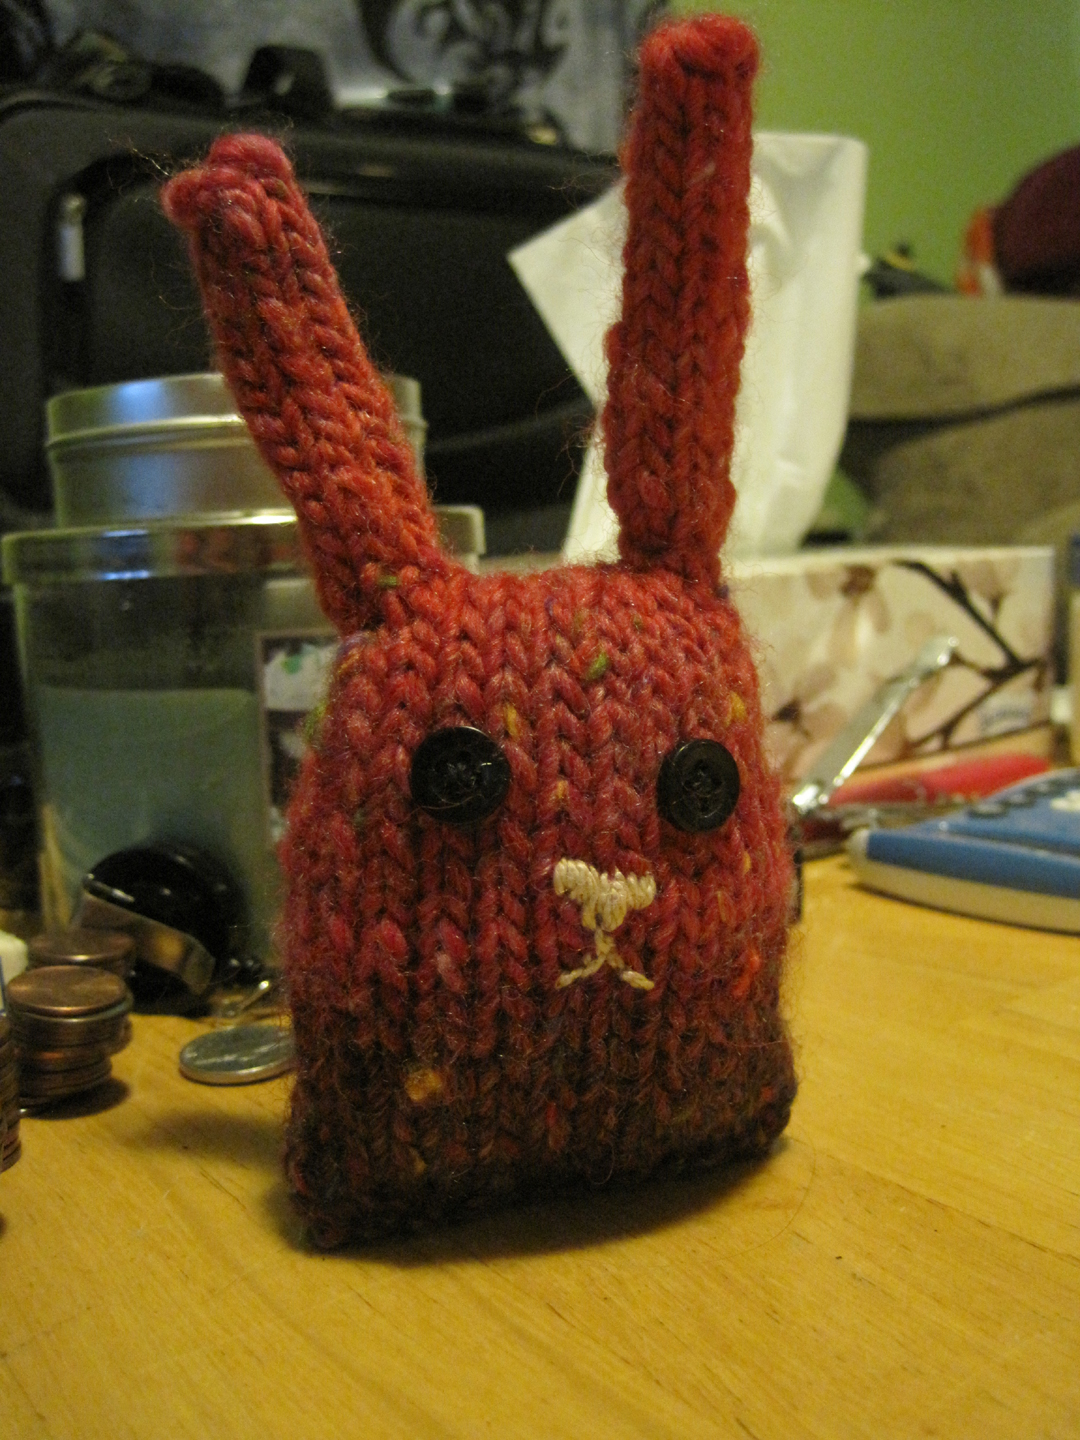
A bunny nugget for my Secret Santa at work

The manicure prize pack from the HK Holiday KAL--crocheted the amigurumi nail polish and sewed the clutch bag behind it all

I also did some crafty work in the kitchen! I made coffee infused bourbon and lavender rosemary infused vodka for my parents. It was my first time playing with infusing alcohol, sooo easy! I followed 'recipes' for the first time since I was afraid of screwing it up, but next time I think I'll make up some combinations of my own. In the sweets department, I made peanut butter cups, apple cider caramels, and dark chocolate almond coffee sea salt bark. These went to my parents and I brought the extras into work where they were well-received.

All in all, pretty pleased with myself! I was happy to be able to give some great handmade gifts without stressing myself out.