sewing

My Fall 2017 Making List

If you missed the concept and explanation of my Making List, you can check out my first post for more details. Essentially, it's a way for me to focus my energies on the projects that are most important to me and feel less scattered/overwhelmed about my making.

The following items from my original Making List have been completed or cast on:

  1. Saturday Matinee Socks - finished
  2. Rainbow Leyburn Socks - finished, but as a different pair of socks that I started!
  3. Lopi Pullover - cast on
  4. Fen Dress - finished
  5. Watson Bra - finished
  6. Wiksten Tank 2 - failed, but attempted before throwing in the towel!

I also practiced my spinning with some fiber from my stash.

Since my priorities are shifting with the seasonal change, along with my current break from design work, I've updated my Making List to reflect my focus for fall. 

WIPS

  1. Lopi Pullover
  2. Fibre Co Stripey Raglan - this is a carryover WIP from the first list
  3. Charlemont Thermal - another carryover
Stripey Raglan vs Lopi Pullover

Stripey Raglan vs Lopi Pullover

I am hibernating my Miss Babs Cardigan design WIP for now, since it's not grabbing my attention. But it's there when I want it!

CAST ON

  1. Bonnie Banks Shawl for my mom, in Blue Moon BFL Sport
  2. Speckled Space Socks, using one of my stash sock yarns
  3. Impromptu - but only after finishing at least one garment from the WIP list!
Untitled design (10).png

SPIN

  1. White British Wool - I destashed the yarn I was planning on using for the Brookdale Vest, which was originally in my last CO list. I'm hoping to spin this into a Brookdale-suitable yarn!
  2. Spun Right Round Merino
  3. Malabrigo Nube

SEW

  1. 2nd Watson Bra
  2. Flannel shirt for Mark
  3. Serger projects, if I can get over my fears and teach myself how to use my serger!

In addition to my original Making List 'rules', I have added these two for fall:

  1. Cast on for new items after finishing the previous object in that category. IE, finish a garment before casting on a new one; finish a portable accessory before casting on a new one. Same principle for starting spinning and sewing projects. 
  2. Use stash for everything possible. In this case, I had to purchase a second skein of BFL Sport for my mom's shawl (to go with one from my stash), and I'll need to buy fabric for Mark's flannel shirt. But everything else I have stashed!


A Bevy of FOs

Here's a quick round-up of all my recent finished projects!

DSC_0605.jpg

In August I made my first ever bra, a Watson Bra using a kit from Tailor Made Shop. I'm counting this as a Summer of Basics FO, and it's also an item ticked off my Making List--yahoo! I was intimidated by bra making but it turned out to be surprisingly easy, and my only gripe was struggling with my machine eating the small seam allowances whenever I started a new seam. I did a straight 32C with no alterations, except for the straps. They're supposed to be attached to the top of the cups with rings, but that would put the adjustable buckle on top of my traps and I prefer having the hardware on the back of my body. Next time I might experiment with taking a small amount of fabric out of the band, as it fits comfortably on the middle set of hooks but I prefer starting a new bra on the outermost set of hooks so I can wear it longer before it gets stretched out.

DSC_0585.jpg

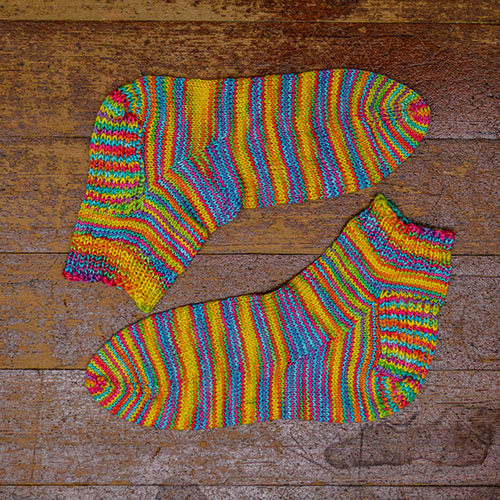
I finished my languishing pair of handdyed socks, also a Making List item! (I'm feeling very accomplished, dontcha know.) These are nothing crazy special, just colorful, vanilla shortie socks that will always be welcome in my wardrobe.

DSC_0628sm.jpg

And last weekend, I jumped back into spinning after a long hiatus (almost a year!) To practice, I pulled this braid of Frabjous Fibers Merino Top in Scarecrow and I was pleased to discover my muscle memory hadn't faded. Yesterday I did another spin and will share photos once that yarn is dry. I have several spinning projects on my Making List, and I'd like to use up 90% of my fiber supply before I allow myself to purchase any new fiber.

I recently finished up all my design obligations, meaning I'm not contracted for any pieces and I'm not working on any self-published designs at the moment either. I'm really looking forward to taking this time to work on my Making List, sink my teeth into some longer-term sewing or spinning projects, and enjoy some selfish making time before I return to designing. Happy fall to me!

Summer of Basics FO #3

I put off writing this post for a bit, but at the beginning of July I whipped up my third Summer of Basics item!

This is the Fancy Tiger Crafts Fen in dress form, done in some railroad denim also from Fancy Tiger Crafts. Umm...this is perfect. It came out exactly how I imagined it--better, in fact!--and sewing this was an absolute DREAM. I love sewing with woven fabric, I have discovered.

I made my Fen top in a size 4, and thought about sizing down to a 2 for the dress...but then I realized that a size 4 in the top=size 6 in the dress in the bust region, so I did a 4 in the dress. I was mostly worried about having too much positive ease in the waist and having it look more sack-like than 'gloriously casual and comfy summer dress', and am pleased with how the fit turned out. Only issue is that my lats are clearly bigger than I realized and I have to wiggle myself delicately through the waist to get it on!

My plan from the beginning was to do some kind of directional play with the stripes and have them going in different directions for the top and bottom. Again, I can't believe it worked out so well. I hadn't thought about the pocket facings when I first planned my stripe idea, so on the fly I decided to make them stripe horizontally as well and I love the contrast. 

My only mod was to make the neck opening smaller, as the Fen top is a little big for my preferences--it tends to slide to one side for that Flashdance neckline look, which I don't hate but wouldn't work for this dress. I winged this one by moving the pattern piece over a few inches and using the same neckline curve from there. I did all French seams, which is my favorite seam technique so far. You know, out of the two or three I know how to do!

Another item crossed off my Making list successfully!

My Making List

I recently discovered The Craft Sessions and fell down the rabbit hole of her Stash Less blog post series. Ever since I stopped working at Webs, my yarn consumerism has been way down and even before I left there, I was starting to be more mindful about my stash. I've done several purges of yarn, leaving me with a full yarn cabinet (rather than an overflowing one!) of prized skeins that I'd like to work though over the next few years. Coupled with my new budget, my eye is on using what I have and working on projects I've been pondering for awhile rather than heading off into new directions.

Thus, I decided to follow her challenge of creating a Making List. I'm leaving myself free to remove items from this list if I decide it no longer appeals to me, but if I want to add new things to the making list, I need to have completed something or removed something in its place. Note that this isn't my dreaming, wishful thinking list, but rather projects that I am committed to making because I already own the materials and in the case of some, they're already in progress. Designs for self-publishing are included, but contracted third-party obligations are not.

WIPS

  1. Miss Babs cardigan (design in progress)
  2. Fibre Co Stripey Raglan
  3. Saturday Matinee Socks--a finished FO as of Sunday night! Currently blocking.
  4.  Rainbow Leyburn Socks
  5. Charlemont Thermal

The cardigan will be set aside shortly as I have a sweater design I need to start working on. #2 just needs sleeves! Items 3 through 5 are long-standing WIPs, and I'm excited to close those projects out. I am definitely going to finish the Leyburn Socks, but I might change my mind on the thermal and rip it instead--need to dig that one out and take a long, hard look at it!

CAST ON

  1. Brookdale Vest
  2. Lopi Pullover
  3. Anzula Ava Set (design idea)

I have the yarn for all three of these, and the patterns for 1 & 2 to boot!

SPIN

  1. Romney fleece
  2. White British wool
  3. Spun Right Round fiber
  4. Malabrigo Nube.

Spinning is the most long-term of the categories, and I do need to get back into my spinning groove with some practice before tackling these fibers, especially the fleece. I'll likely do some practice spins with stash fiber I have expressly set aside for that purpose. In all honest, I'm not anticipating getting to spinning until the fall, or at least until I finish my current sewing list as that is more important to me.

SEW

  1. Fen Dress
  2. Watson Bra
  3. Wiksten Tank 2
  4. Serger projects

'Serger projects' in this case refers to the stash of knit fabric I have and any possible projects I want to do with it. I've been thinking of some jogger-style pants, pajama shorts for lounging around the house, and a casual tee or two. But first I need to learn how to use my serger!

Here are my tentative rules for the near future:

  1. Projects in the Making List take priority over random flights of fancy. (Exceptions: Any design obligations, duh.)
  2. $50/month budget for craft supplies. For now, I see that going to patterns and notions rather than yarn or fabric since I have a good stash to work from. I can roll any unspent $ over from month-to-month if I want to save up for something bigger than $50.
  3. If I'm avoiding a Making List project or not enjoying it--frog mercilessly, give away to a friend to finish, whatever, but no wasting time on things I don't love.

It may seem weird to put this much effort and structure into my hobbies, but I feel SO MUCH better for having done this. Getting my ideas out of my head and onto paper has cleared up brain space and made me decide what is actually a priority to me. I love having a good plan and I'm excited to get more crafting done the rest of this year! If you made a Making List, what would be on yours?

Summer of Basics FO #2

I have been planning to make a Wiksten Tank for over a year now, and I finally finished it up!

I made the dress version as a muslin a year ago with some stash fabric I already had--another cotton, but a lighter, floatier cotton than this fabric (by Rae Ritchie from the Desert Bloom Collection.) I found there was too much fabric in the upper back with that muslin, so on this version I took about an inch out of the upper back simply by angling the placement of the back when cutting it out, as described here. I cut a size S, based on my muslin and my old bust size of 33". TMI: Since then I've switched birth control methods and my breasts have grown a little, so I'm more like a 34" now. I discovered this fact when I found the bust area too snug once I tried my tank on! I wound up unpicking the top third of the French seams and redoing them with smaller seam allowances so I would have enough room in my bust area.

I decided to lengthen and widen the armholes based on my favorite Madewell tank top, since I found them too tight for my liking. I just laid that tank top over this one, traced the new armhole lines and trimmed the excess fabric off. It wasn't a lot, maybe 1/2-3/4" at most at the bottom of the armhole, but it did change the curve slightly in a way that better accommodates my arms/shoulders, or at least my fit preferences for that area! I had to add some extra fabric to the bias facings for the armholes to accommodate the new dimensions, so I fudged it by adding a little piece onto my existing bias strip rather than cut a whole new one because I'm lazy, and it's going in my goddamn armpit anyway, who cares! I followed this Grainline Studio tutorial for the arms and neck since I was having a hard time understanding the Wiksten directions.

However, I have some issues with the overall finished product that I THINK is due to my material choice, but I'd love to hear advice from more experienced sewists on it. This cotton was listed as being fine for quilting and apparel, though after reading up on the 'can quilting cottons be used for garments' debate that I was unaware of, I suspect that this cotton would be better suited for more structured garments and not a floaty tank top. It's funny--I'm so comfortable with yarn choice that I don't question myself in that area, but now I'm realizing how unfamiliar I am with fabrics and that I need to be extra careful in buying online!

You can see below how the tank fits decently (I think...) in the upper back, but the extra fabric in the body due to the A-line shape just pools weirdly due to the stiff cotton rather than flowing away from my body. That's the fabric's fault, right? Right?!

If you look back at the top photo, the bottom center of the neckline tends to flip out a little. Not sure what causes that!

Another mystery to me is the below issue. When I'm moving around and not adjusting the garment, tugging it down, etc, it creeps up and I get the armhole gap and raised shoulder/back neck as seen on the left. On the right is how it fits when I adjust it back down.

I have to admit, I really loved this print so I'm bummed this isn't the tank of my dreams, but I've convinced myself (rightly or wrongly!) that it's simply a bad fabric choice for this garment and not due to my newb sewing skills, so I've accepted the flaws. It looks fabulous with a cardigan on though! I'm looking forward to trying the Wiksten Tank again with a more drapey fabric, and would love to hear from you all about your tank fitting wisdom.

Summer of Basics FO #1

I knocked out my first item for the Summer of Basics Make-Along on Day 1!

To test drive Fancy Tiger Crafts Fen before starting my dress version, I used stash crepe de chine to try to the top. I was ok with this turning out totally unwearable, since I'm not too attached to the fabric. Luckily, it worked beautifully and I really like this top!

My body measurements put me at a size 4, and since I wanted all the ease in the top I cut the size 4. For the dress version, I'm thinking about sizing down to a 2 to have less ease in the waist. Has anyone successful sized down in a Fen dress for a closer fit?

I did struggle a little with the slippery fabric, and cutting out the bias strip for the neckline in particular was a pain in the ass. I don't have a cutting table, chalk or a rotary cutter so my method is to pin the pattern pieces directly to my fabric and cut them out on my living room rug with my old scissors that probably need to be sharpened. If I don't lose interest in sewing again, I'll definitely be looking into upgrading that process with some shiny new tools!

I didn't finish the seam allowances. I intended to zig-zag stitch them, but the fabric hated that idea and I didn't have enough room to do a clean finish. I plan to handwash it at least, which I'm hoping will slow down any fraying.

Here's to my first sewn garment in about three years!

Handmade Summer Wardrobe Plans

Now that my wardrobe has been assessed (see previous post), I can talk about the projects I have planned for my summer wardrobe refresh/Summer of Basics Make-Along! My main priority is sewing, since I do have some knitted warm weather tops already, so let's jump into those first!

I am DETERMINED to finally make my planned Wiksten Tank! I purchased this Rae Richie Desert Bloom fabric from Drygoods Design OVER A YEAR AGO. I made the longer, dress version as a wearable muslin and I think I ran out of thread in the middle of it, plus hated the way the dress looked so I didn't finish the neckline. But the dress showed me that I will need to make an upper back adjustment and take out some extra fabric there. I've never altered a pattern like that before and I'm a little nervous!

I'm trying to use up some of my existing fabric stash to avoid waste and to get back into the sewing groove before treating myself to some fancy new fabric. I bought this crepe de chine from Girl Charlee Fabrics...I think in 2014?! I'm not sure what the hell I had planned for two yards of this monstrosity, and decided to make a Fen Top as practice for the next project. I don't love this print now, but I'm hoping it will be cute as a small dose in this drapey top.

And THIS is the project I'm most excited for--a Fen Dress in Railroad Denim from Fancy Tiger Crafts! I'm thinking about putting the stripes in opposite directions, like running vertically on the top and horizontally on the bottom. Or maybe the other way around! (Thoughts on that?)
I have other, more nebulous plans depending on how I feel, but these are the three definites. I own a serger that I don't know how to use, and a stash of knits I have ideas for. I'd really like to serge those projects though, I'm hoping I can learn to use my serger this summer. On the knitting front...nothing definite yet! I was thinking about making a Brookfield Vest or a Tegna, but I agreed to some design work due in September and now I'm not sure what my free knitting time will be looking like.
It's hard not getting a million ideas and chasing them all. I recently read Overdressed: The Shockingly High Cost of Cheap Fashion, and while I was already aware of most of the issues mentioned in the book, it really hammered home for me that slow fashion should be SLOW. I'm trying to get better about savoring the process, the planning and the slow making above the consumer-y glee of having another FO. The feelings when completing a handmade garment are of  course deeper and more meaningful than purchasing something from the store but in the end, I don't want my end goal to just be the acquisition of more stuff. I'm concentrating on:

  1. Using the stash I already have; ie that bright crepe de chine. My fabric stash is small, so I don't have a lot of fabric I dislike that I need to utilize before I can buy fabrics more suitable to my current needs. (I have vague plans for most of that fabric, actually!) On the yarn front, since leaving Webs I don't buy yarn quite the way I used to and I have a stash I'm very, very happy with!
  2. Repairing and wearing the clothes I already have. I have a tendency to channel my inner frustrations into my wardrobe sometimes and take it out on my clothes, accusing them of making me look too old/young/frumpy/sexy/etc. As I get older, I have more positive days than negative overall re: my body and body image, so I'm trying to get myself to chill out to get through the bad days instead of letting the frustration send me to buy new jeans. New jeans don't magically fix everything!
  3. Paying attention. That means paying attention to how I feel in my clothes, what I feel is missing from my wardrobe (and how much I actually would use it vs the fleeting urge of wants), and enjoying the process of making. I'm no longer interested in making things for the sake of the final thing if I find the process itself unbearable.


Playing with Color: Dreamer's Braided Pullover

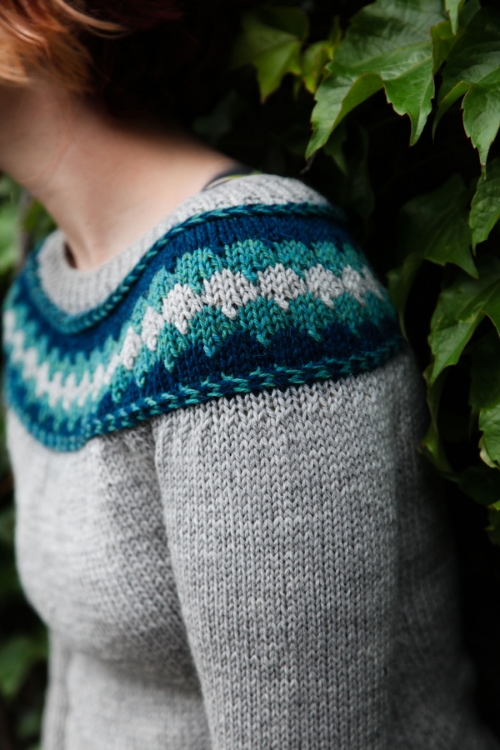
I know I know, it's July and you don't even want to THINK about touching a long-sleeve wool pullover. I'm sorry. (Not really.) You might not be ready to start knitting but why not start playing with color options for your future Dreamer's Braided Pullover? Spend the summer months picking out colors and then begin knitting once fall hits! This design was originally published by Valley Yarns in their Sheffield, which is discontinued, so I was given the rights back to publish it myself and I reknit it in Cascade 220. As such, we already have two color combinations of this sweater floating around. I'm going to focus on options in Cascade 220 since it's such a versatile and affordable yarn. For the sample, I chose a palette of grey and aqua/teal leaning blues.

IMG_6545smallestPhoto by Lindsey Topham

One of my favorite things about 220 is the mix of solids and heathers in the color range. Just like mixing in a warm color with cooler ones adds dimension and visual interest, mixing solids and heathers can really spice up the look of your color palette.

You've got lots of options to tackle color for a sweater like this! In all the pairings shown, the center color is the main body color of the sweater. You can choose either accent color to be used for the corrugated ribbing in the hem and cuffs, though in my sample I used the darker color. Of course, you could always work plain ribbing in the MC and have the colorwork be contained only in the yoke of the sweater. (All photos below from Webs.)

Option 1: Neutral MC, two different pops for the CCs

2425 8013 9341From L to R: 2425 Provence, 8013 Walnut Heather, 9341 Garnet Heather

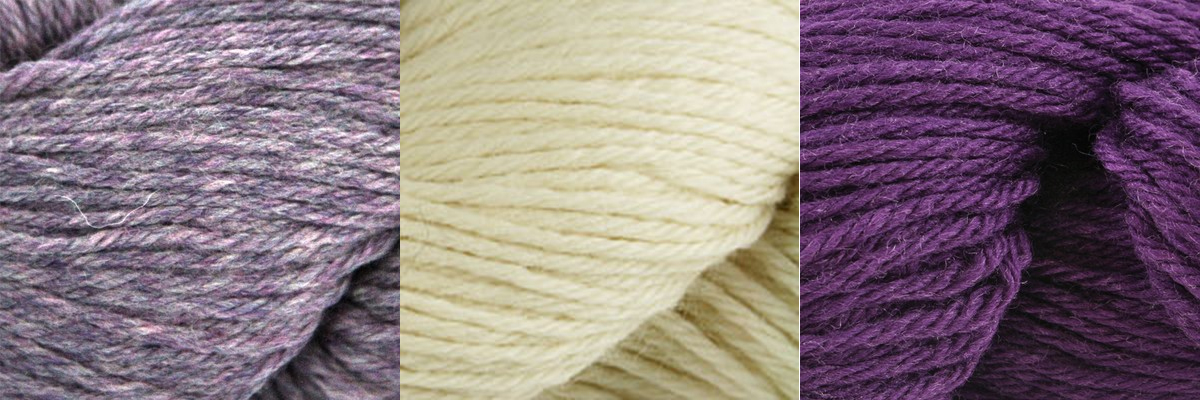
Option 2: Neutral MC, two tonal coordinates for the CCs (same approach as the sample sweater)

9641 8010 7807From L to R: 9641 Purple Tourmaline, 8010 Natural, 7807 Regal

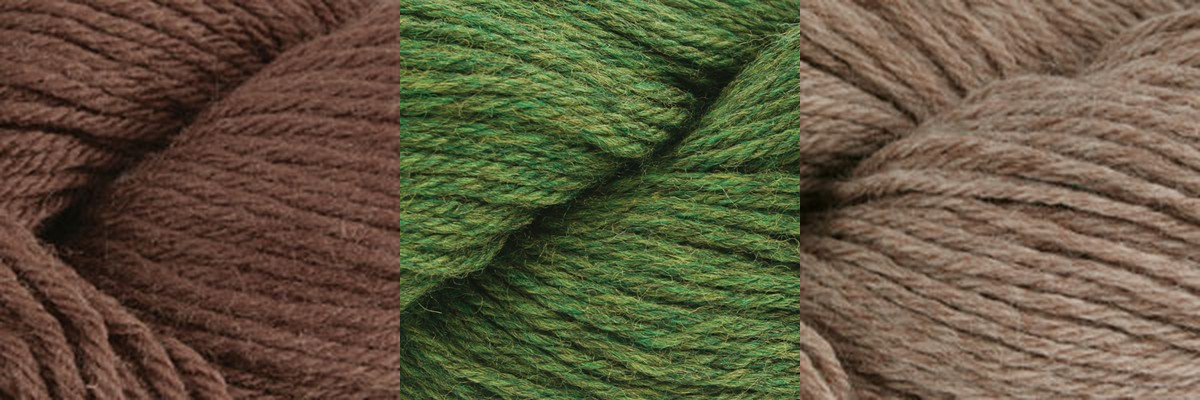
Option 3: Non-neutral MC, two tonal neutrals for the CCs

8686 2429 8012From L to R: 8686 Brown, 2429 Irelande, 8012 Doeskin Heather

For the sake of covering all our bases and bringing these options back to full circle...

Option 4: Non-neutral MC, two different pops for the CCs--this one's for the adventurous!

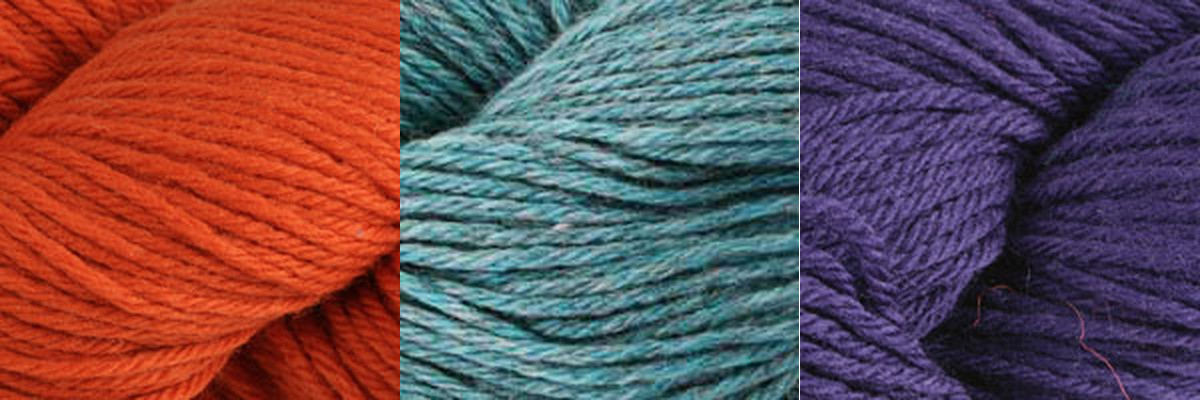
7824 9452 8886From L to R: 7824 Burnt Orange, 9452 Summer Sky Heather, 8886 Italian Plum

Luckily, there are a ton of colorwork sweater patterns out there, so you can always browse other people's projects on Ravelry and get inspired by their choices! My favorite method is to head to my LYS and start playing with the skeins on the shelves. I always come up with new and unexpected combinations that way and it continually surprises me to see what works together.

Pole Antics

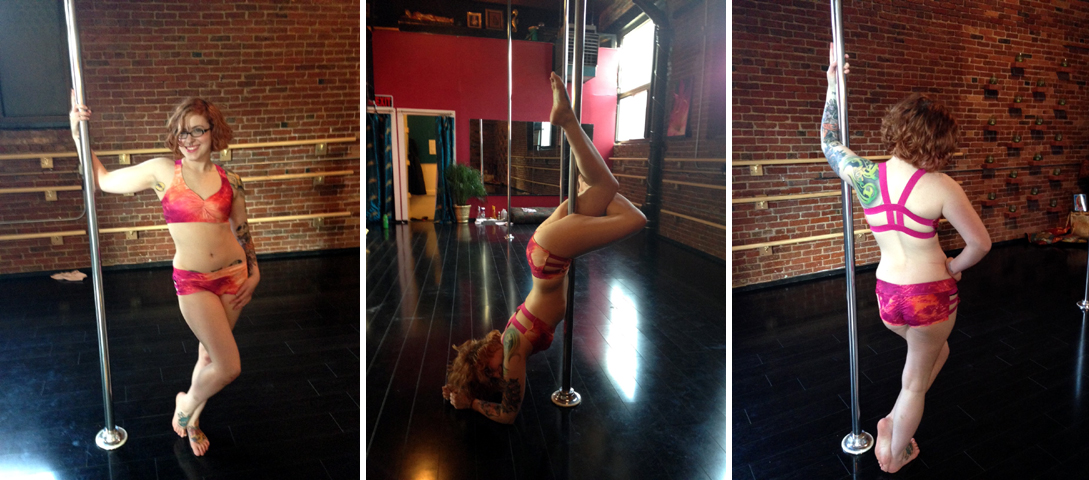
For those of you new to this blog, I pole dance. I'm not a stripper, meaning I don't pole dance to make money and I don't remove articles of clothing while dancing with the intent of becoming partially or fully naked. (Some lovely acts involve costume changes while dancing, hence the 'naked' qualifier at the end.) That aside, there are plenty of similarities between what strippers do and what I do, and it would do them a huge disservice to pretend that I am 'better' than they are--because I'm not. Pole dancing in any situation is an extremely athletic act, and many modern moves were born in strip clubs rather than being adopted from Chinese pole or mallakhamba. I have nothing but respect for strippers--hanging from one knee is difficult enough, let alone having to do so while wearing 6" heels and possessing the customer service skills of a waitress or hospitality industry person! Anyways, that's not the point of this post but I felt it needed to be said. I understand the impression most people have of pole dancing though and I'm not offended if you are uncomfortable with it--feel free to skip my pole posts! I'm performing in a Halloween showcase in a week, alongside many other lovely ladies and I just had to go full throttle...by making my own costume! Today was our dress rehearsal so I snagged some photos afterwards.

pole costumeArmed with this great printed spandex from Spandex House, my favorite source for stretch fabrics, I immediately went back to my comfort zone of sewing--aka, making shit up. There are a few practical considerations for making a pole costume, primarily in terms of coverage. Obviously I wanted something secure enough that it would stay on as I spin and invert, but you also need a certain amount of skin exposed to ensure better contact with the pole. Your knees and inner thighs are used while climbing and sitting on the pole, respectively, while your waist needs to be bare for certain inverts. In short, sex appeal is not the only reason why pole dancers wear what they do!

I used an existing pair of booty shorts as my 'pattern' for the proportions and shape of these ones, but added in the open side panels with elastic strapping. You can't see it in these photos but the butt features that scrunch butt ruching that is very flattering. ;) The top was harder since this was my first time using soft bra cups and I found them really hard to place properly in the lining--mostly because the strappiness of the top meant I wasn't able to really try it on until it was fully assembled, and I needed to put the lining in before then! Luckily, I have a small chest so I didn't need anything more than the cups and a thick elastic bottom band to keep everything supported. The center of the bust is also gathered to match the shorts and create a more flattering neckline for my shape. And that strappy back (or backless)....perfection! Exactly what I was going for, and incredibly comfortable it turns out.

Now I just need to practice my full bracket grip until Friday!

My Finished OAL Dress

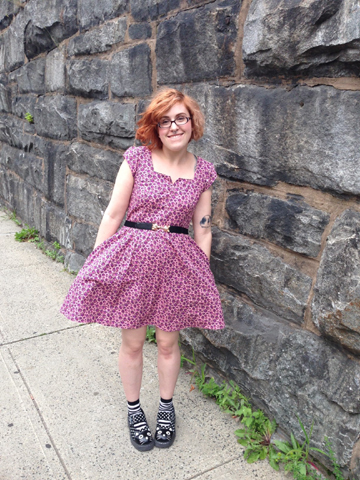
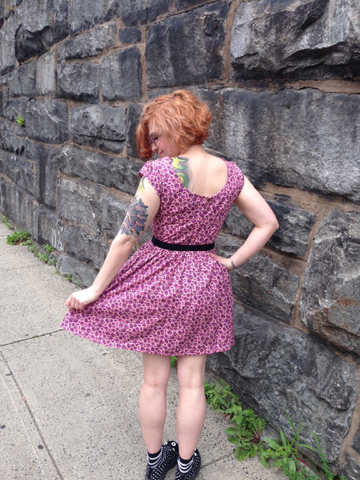
I finished the day after the deadline...but I finished my Outfit Along dress all the same! photo 3I went with the official OAL pattern, Simplicity 1803. This is bodice view C with cap sleeves. I cut a 6 on top and graded to an 8 for the bottom, since the finished measurements for the waist on a size 6 was my exact waist measurement and I wanted to have room to move, but I probably didn't need to do that as I wound up taking out a lot of ease at the waist when I put the zipper in. I also made the adjustments for petite ladies because I'm short, yo. The only other mod I made to the original pattern was moving the pockets to the side seams where they BELONGED rather than keeping them in the weird princess seam panels along the front.

photo 1(2)The fabric is a Betsy Johnson floral cotton print I bought from Mood Fabrics, which was really fun because I could pretend I was on Project Runway when I got the package in the mail. It's definitely super girly, but I don't have any girly pink floral dresses! I wore it belted with my kitty shoes yesterday (for comfort) but I can totally see this with flats, sandals, heels, a slouchy cardigan in winter....lots of options.

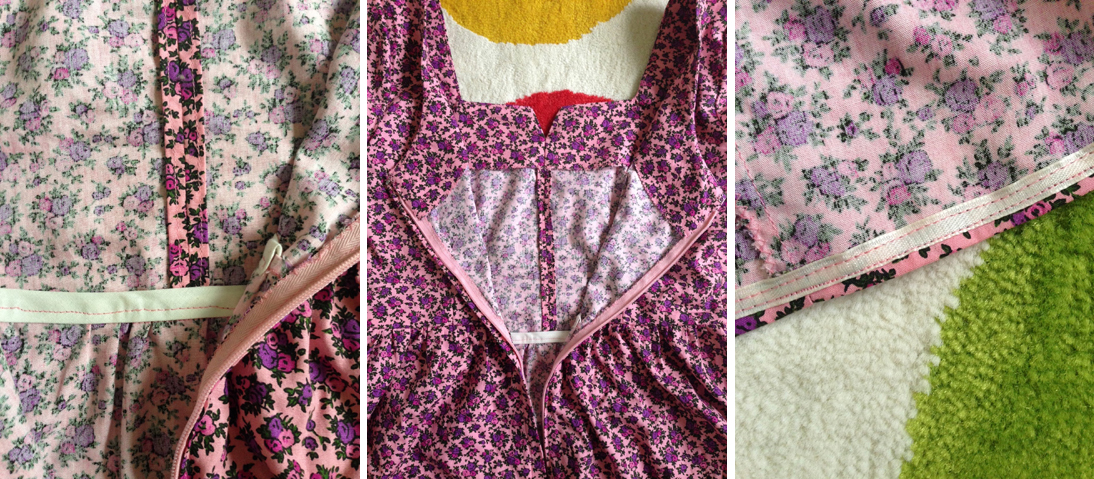
I am really proud of the insides of this dress! For those of you that don't know, I've been sewing since I was a teenager but I always made up my own patterns because I didn't have the patience and understanding to follow patterns. I even participated in a fashion show in high school with my own collection! I never finished seams and worked a lot with knits, where it didn't matter that I didn't finish seams. So this dress is pretty special to me since it's probably the first time I have followed a pattern to the letter AND did all those professional niceties to the insides.

insidesTo stretch my wings I used a variety of techniques. I did clean finish seams on the center and sides of the bodice, zig zag edges for the princess seams, skirt and sleeves, and a bound seam for the waistband with bias tape. (Plz to be ignoring my less than perfectly straight stitching on the waistband and hem.) For the hem, I chopped a bunch off since the dress as it stood was too long for lil ol' me, but I calculated wrong and chopped too much off to do a turned hem. Thank god for Lauren and her wonderful OAL posts--I stole her idea of hemming using seam binding! I used some cream ribbon I had on hand to match the waist binding, though by that point I was pretty fed up by fussing with the hem so my stitching is terribad. You can't see the thread from the right side though so IDGAF.

You'll notice I didn't make a full outfit--I have enough knitting to do for work that I wasn't up to knitting an accompanying piece. I am so glad Andi and Lauren put this together though! I feel like my sewing mojo is in full swing and I am super excited to add more pieces to my handmade wardrobe.

A Different Kind of Stash

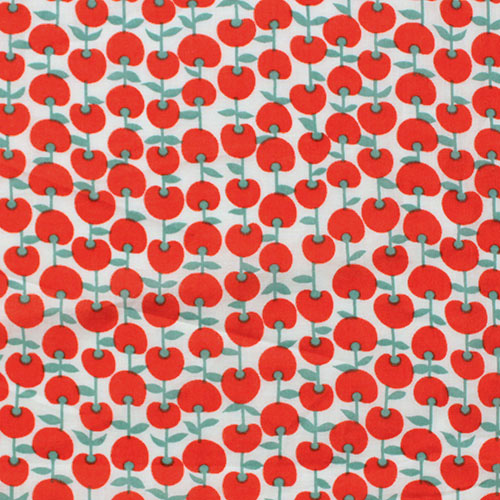
Thanks to horrible/wonderful enabler Emily Ringelman I discovered the wonders of Girl Charlee, online fabric paradise for the print lover on a budget--hey, that's me! In preparation for my upcoming descent into poverty, I snagged some fabric now so I can keep on sewing. I have a super modest fabric stash, most of which is leftover pieces from old projects....so this is really my first official fabric haul! dresses

I grabbed both of these knits to make as-yet-undetermined dresses. Thinking Lady Skater for one and not sure on the other--any suggestions?

tops

That adorable (and now sold out) fox knit is destined to become a Briar! I'm liking the cropped version but we shall see. The multi is crepe de chine which I've never used. I think it would be suitable for blouse, maybe something tunic-y? Suggestions also welcome there! (And if my fabric + pattern matching skills are completely off base, do speak up experienced sewists. I WILL thank you!)

fabric4

And lastly, some cotton lawn for a Hollyburn! I'll have to line it though since the fabric is a little sheer.

First of all though, I need to finish my damn dress for the Outfit Along! I only have to sew in the zipper, hem and finish up the armholes but I've been dragging ass on it since I don't like doing zippers. If I make decent progress on my deadline knit for this weekend I've told myself I WILL finish the dress. Not allowed to play with new fabric until I do!

Scallop

I finished my Scallop of the Sea!

This was super addictive knitting. Even if the KAL wasn't keeping me on track, anything with stripes always keeps me going, it's that "one more stripe" aspect!

Katie made the lining for me so she could shoot the photo tutorial, which meant even less work on my end. It kind of felt like cheating, to go from knitting to sewing in a fully-made lining!

Now I just need to find the perfect strap, since I am sooo not a clutch kind of girl. Hands free for dancing, that's the way I usually rock it out!

Saturday Sewing

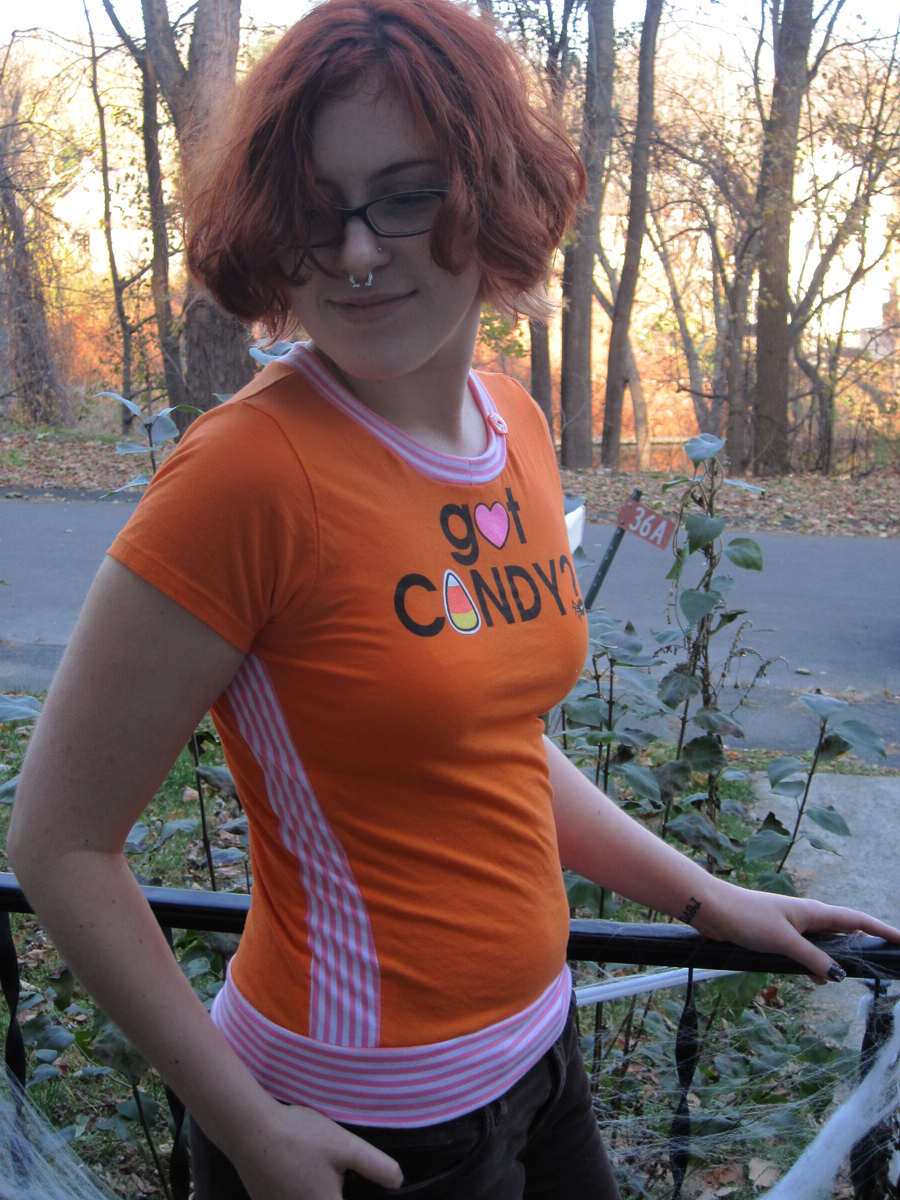
My left wrist has been sore since yesterday (I blame pushups) so I decided to take a knitting break this weekend. Gotta stay busy and crafty somehow...it's sewing time! I picked up this kids t-shirt in the after-Halloween clearance sale....last Halloween. This one's been sitting in my to-do pile for over a year! I technically fit into the shirt before the recon, but not in a very comfortable or publicly-appropriate way. So I added side panels, redid the neckline to make it bigger and added the bottom band for some length. Plus a cute but non-functional button at the neckband because, why not?

Luckily, our laziness in taking the spiderweb decorations off the porch has served me well by providing a seasonally appropriate backdrop!

Halloween Party Photo Post

Our Halloween party was Saturday night and it was a smashing success!

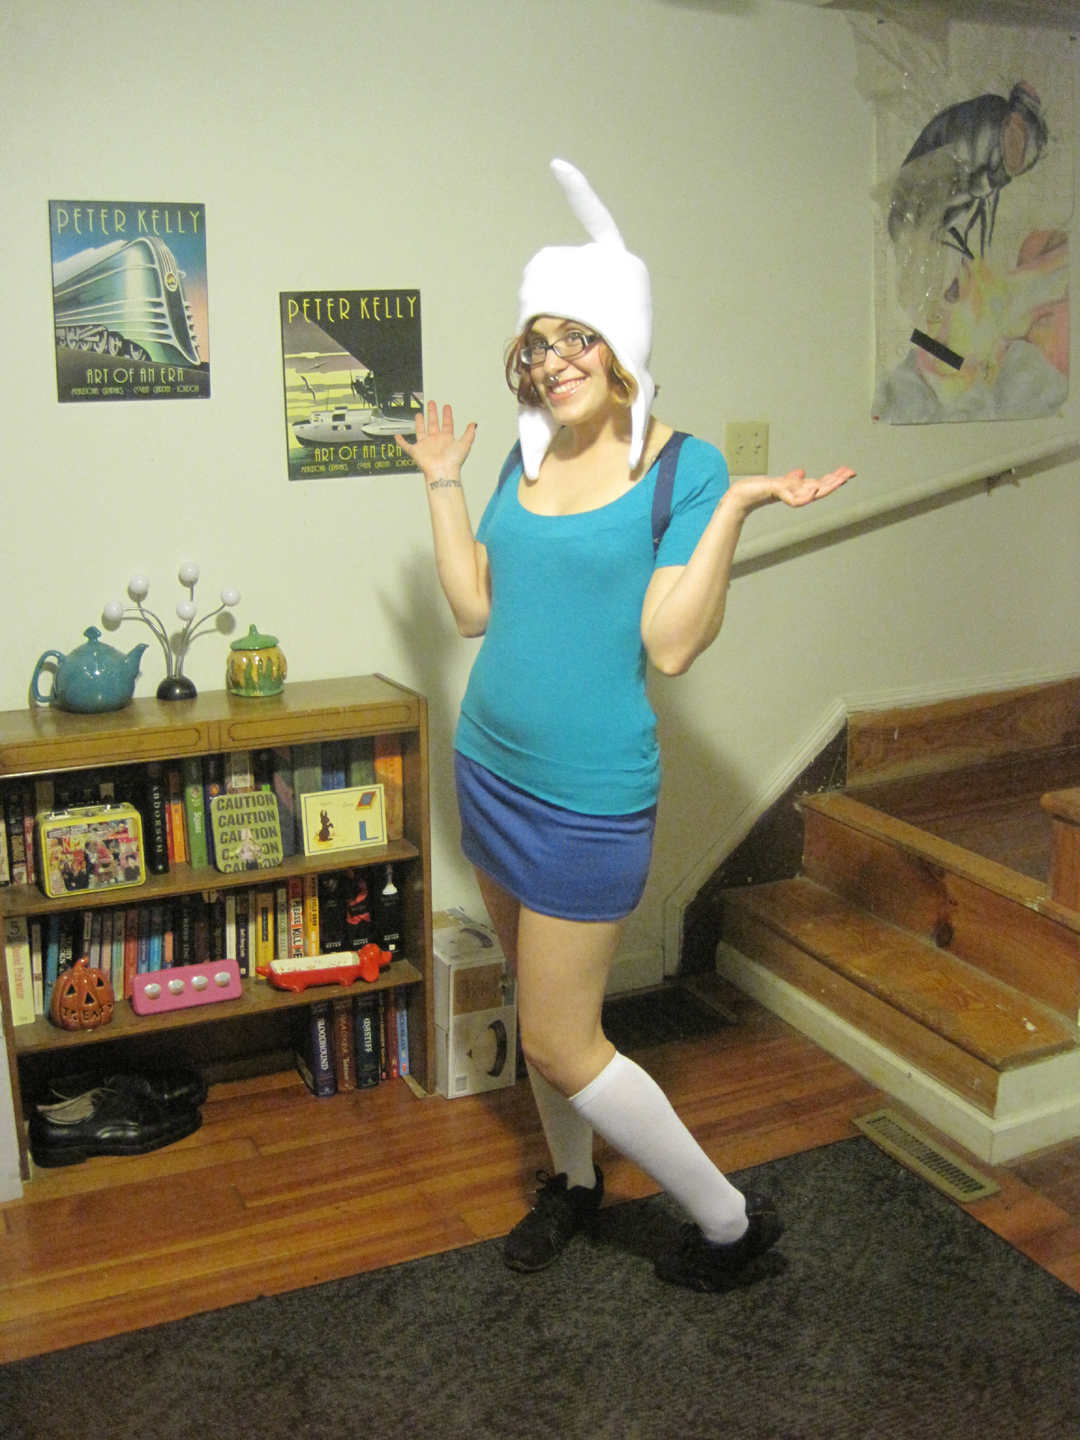
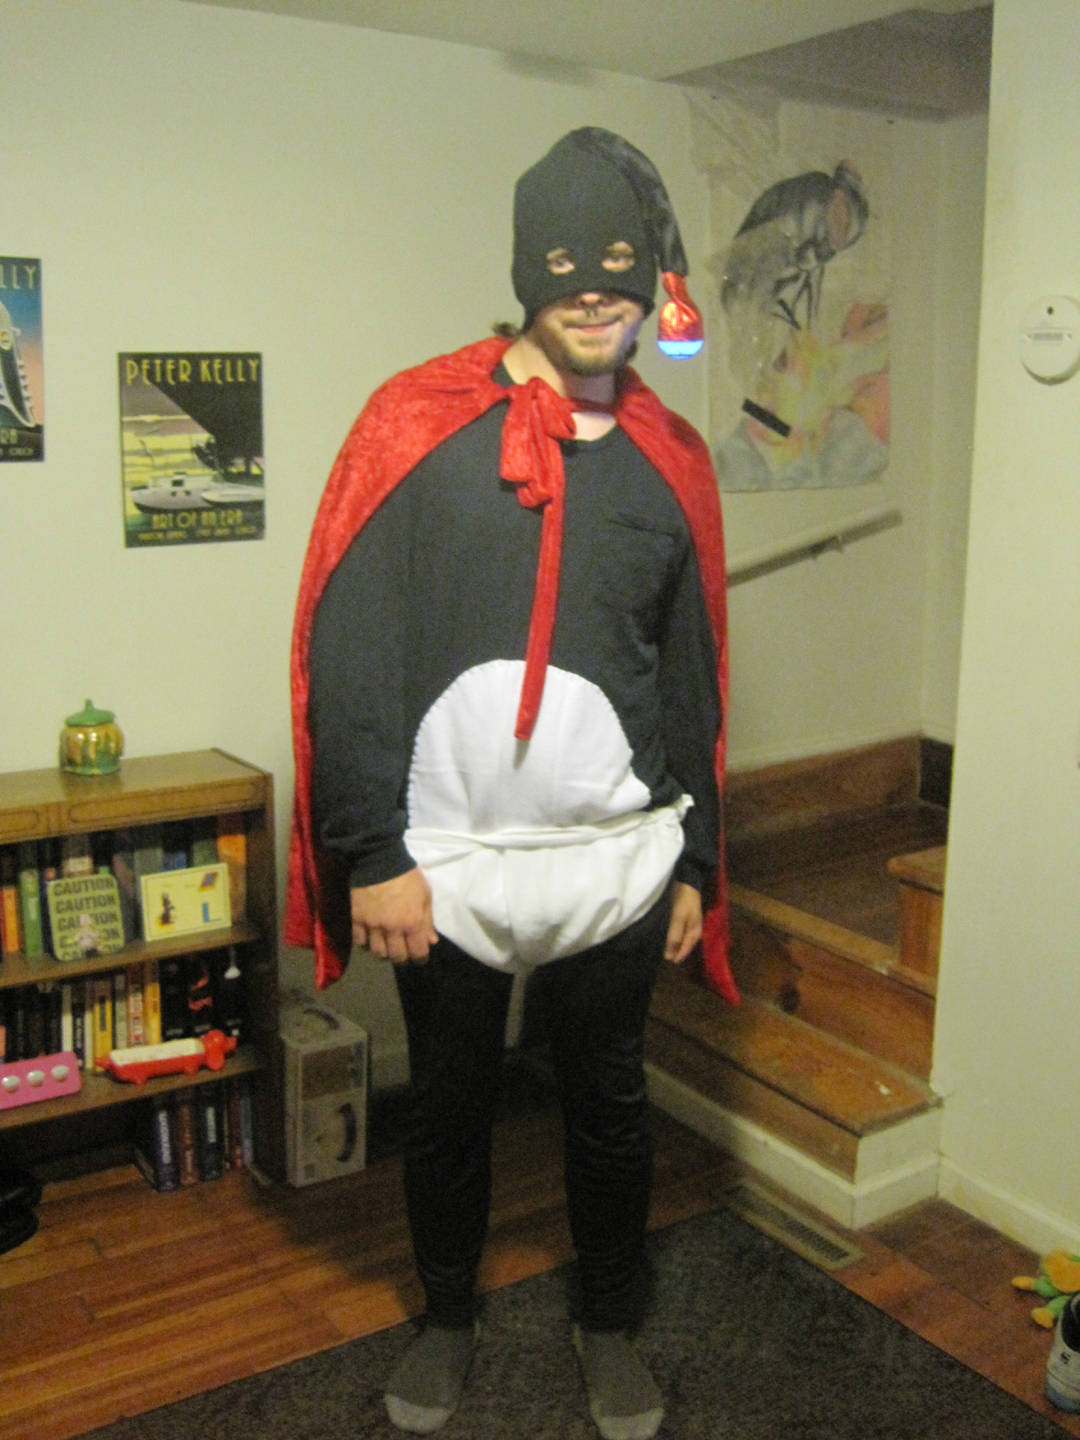
I was Fionna from the gender-swapped episode of Adventure Time. Super easy costume, just had to make the skirt and the hat (which has two ears, one is folded down in the photo.) I also helped make Erik's costume:

He was a dead version of Nibbler from Futurama, hence the limp eyestalk. I helped him make his headpiece and made the cape and shirt. I have to say, I was probably more excited than one should be about their boyfriend wearing a diaper. I was happy that he went all the way and got into character! Halloween is important, yo!

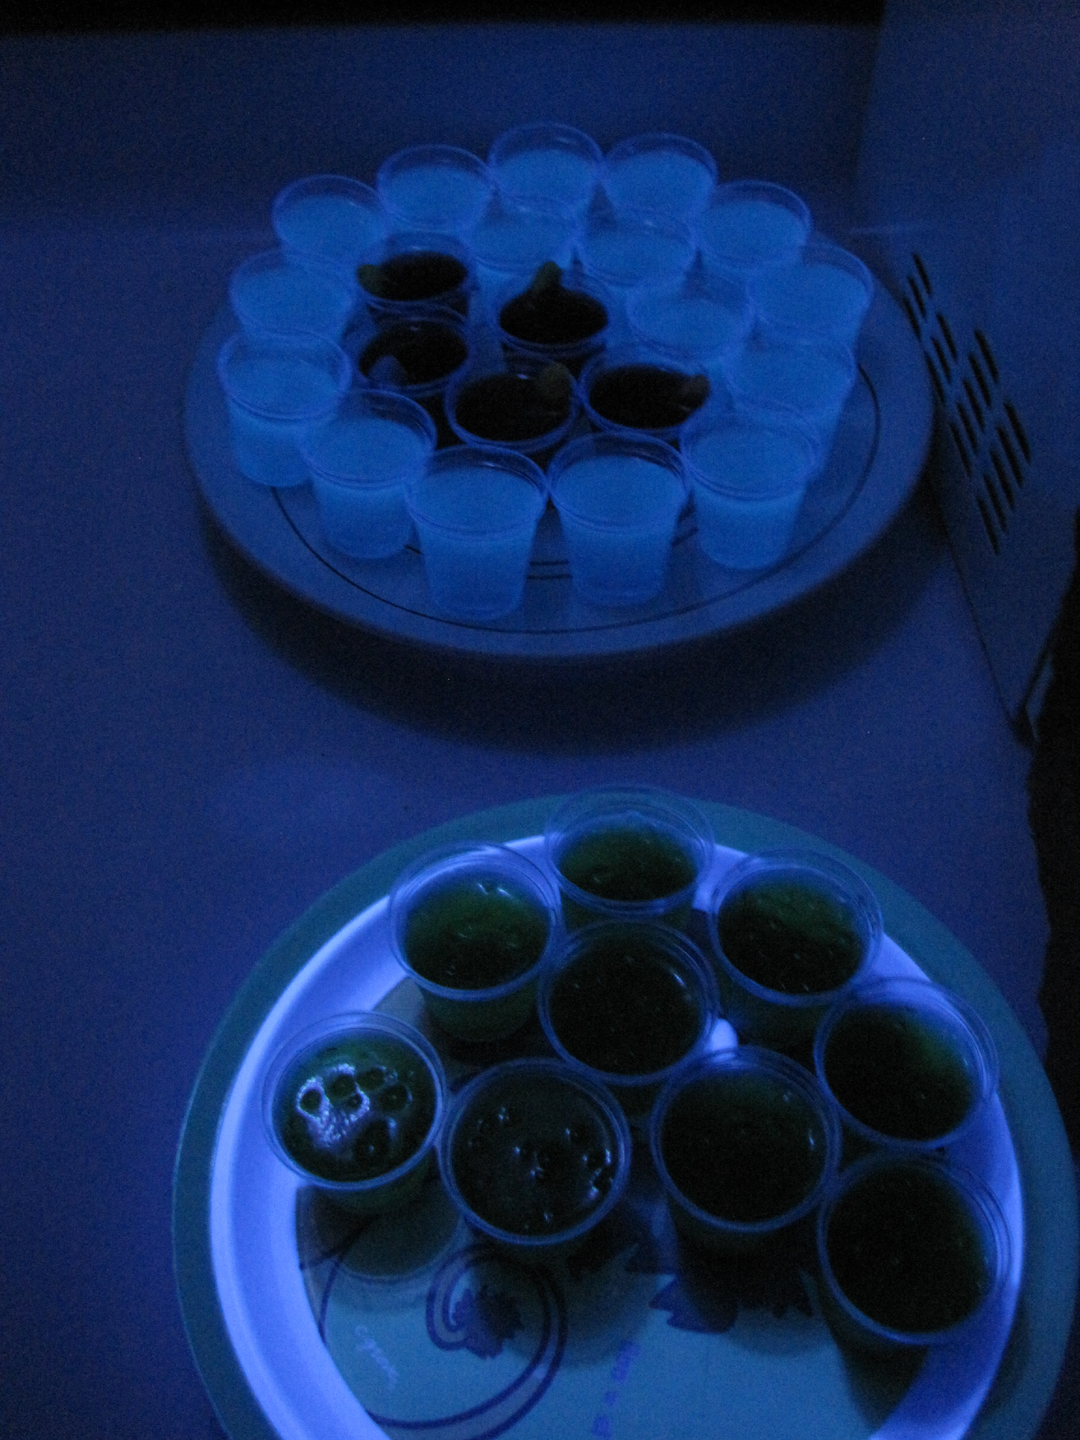
We had a bevy of jello shots, including ones that glowed under black light thanks to this awesome site.

The night also included: homemade cupcakes, mini tacos, a bonfire with s'mores, face painting and lots of music and dancing! It was the perfect mix of new friends and old, everyone mingled with ease and there were no cliques. Halloween is my favorite holiday and I'm glad we celebrated it with style! Now the weather just needs to behave so I can go to another party tomorrow night!


Now for something completely different

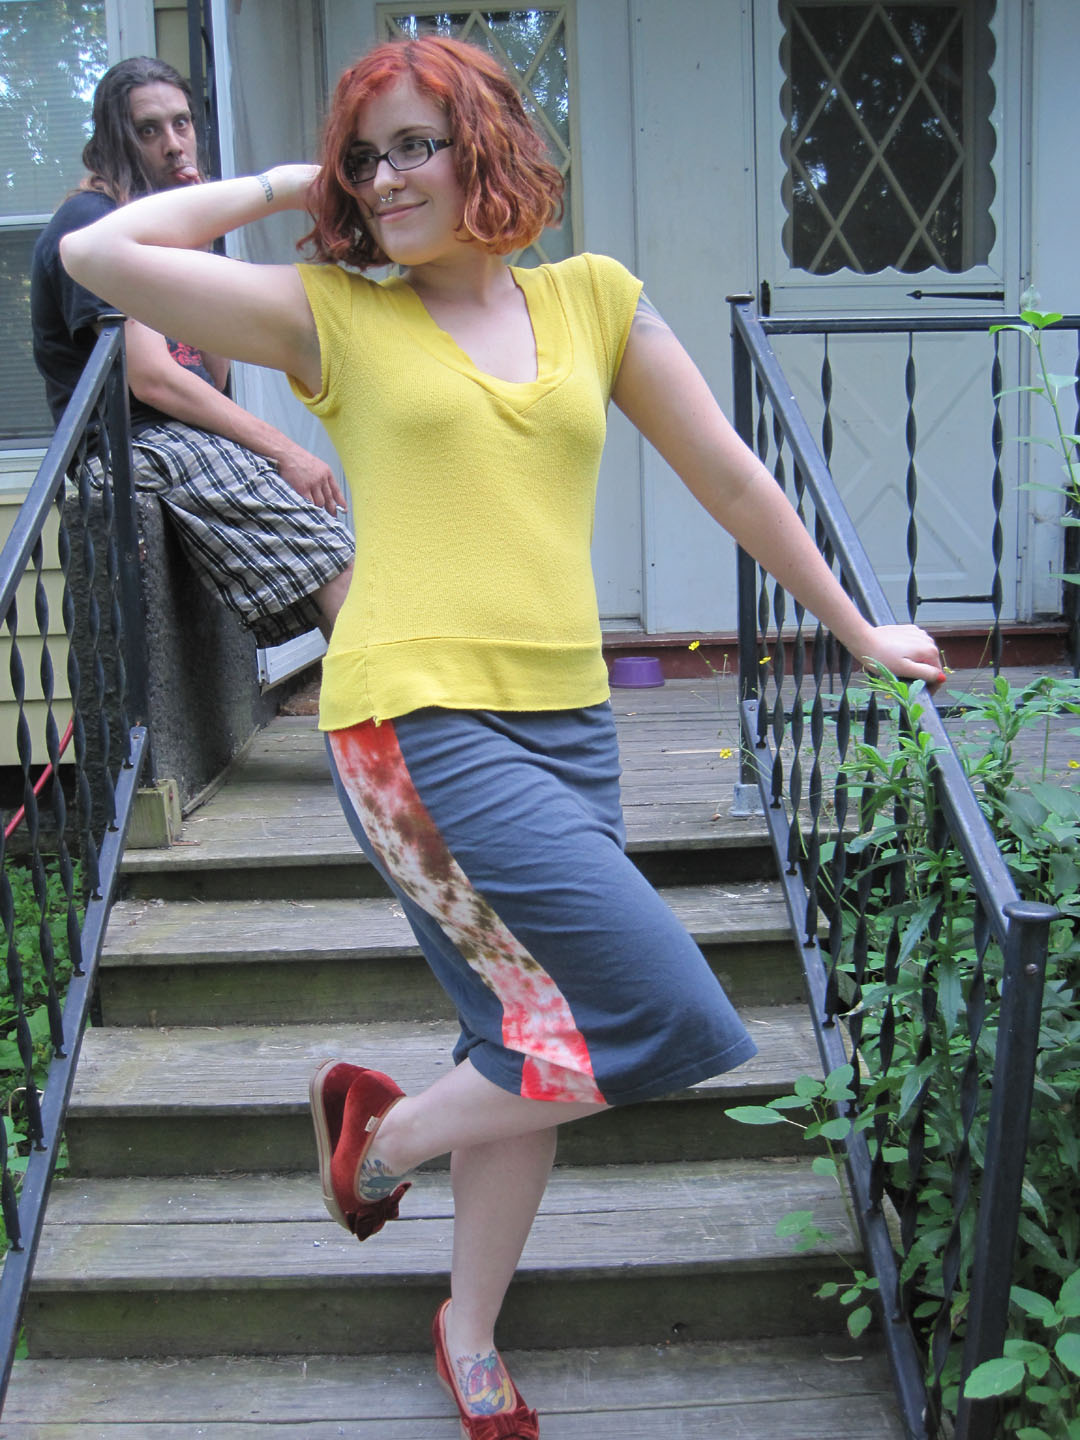
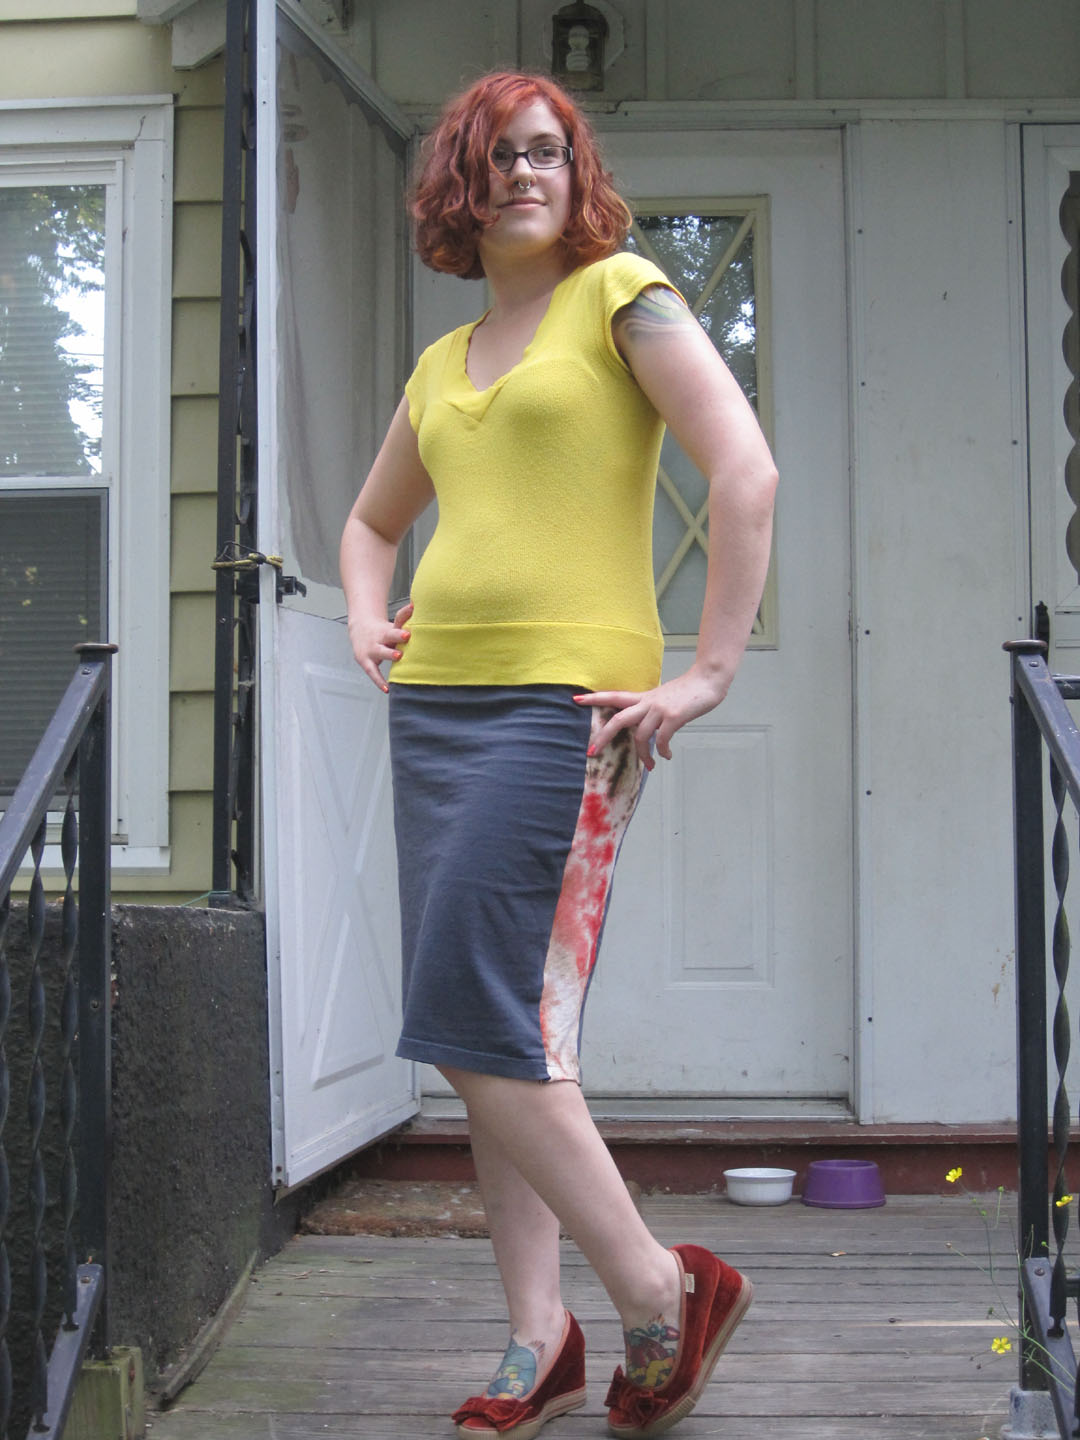
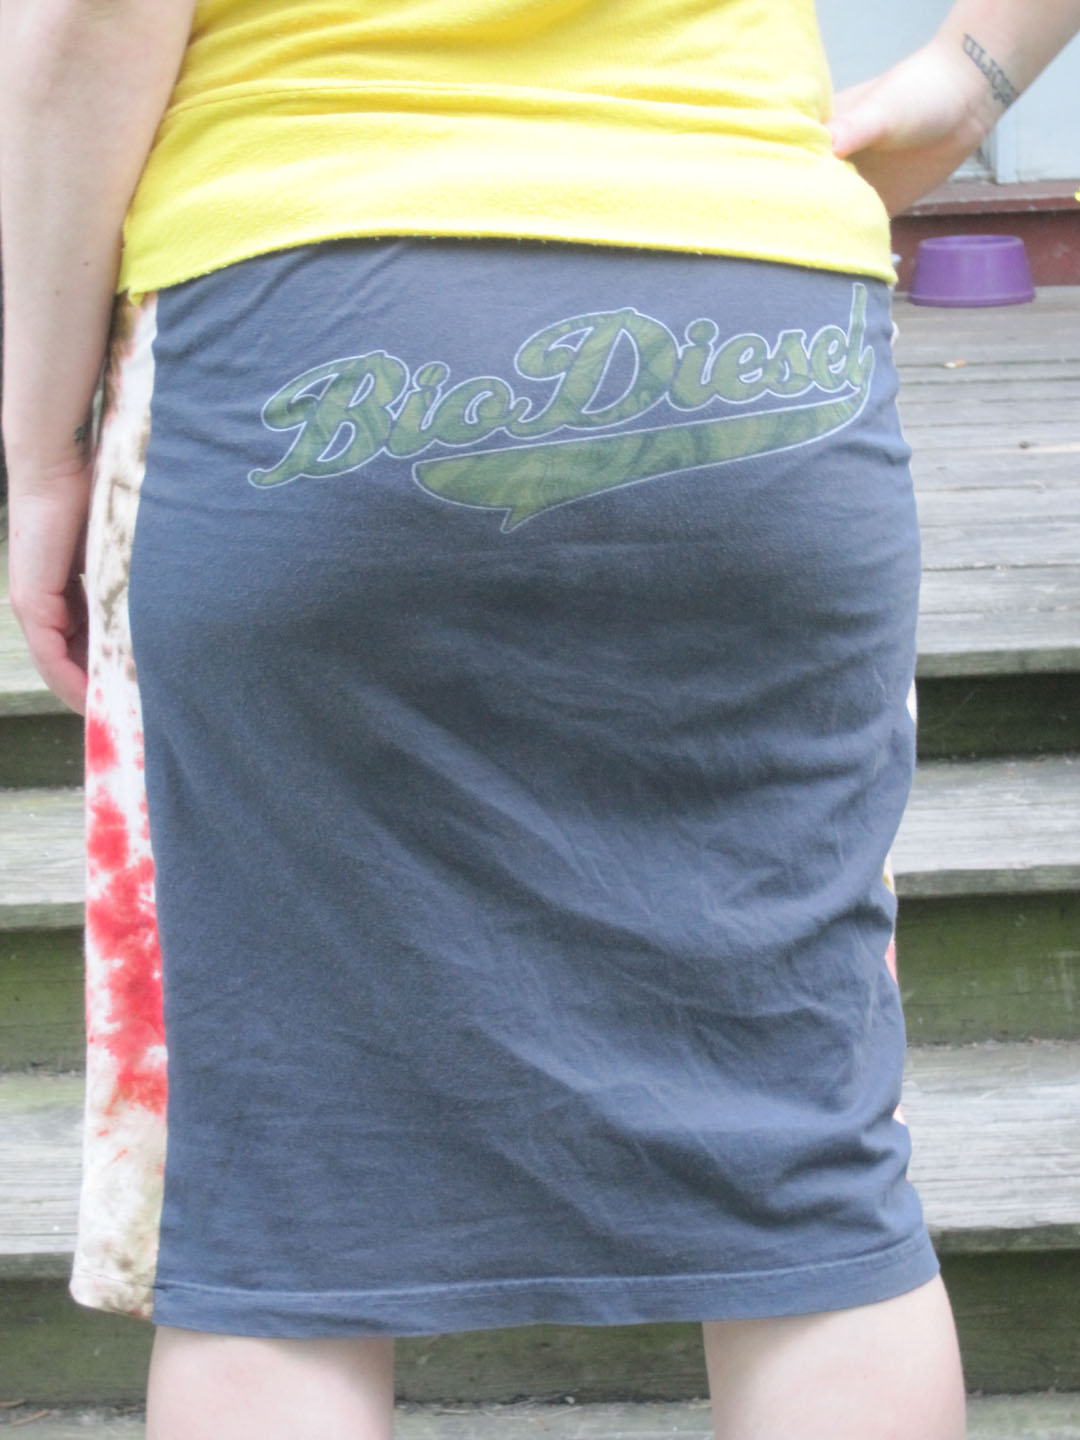
I felt inspired Wednesday night and whipped together this skirt. It's just a t-shirt with jersey fabric from my stash for the side panels and waistband. I first started sewing in high school after finding the t-shirt surgery group on livejournal, and I still prefer to work with stretch and knit fabrics.  I don't use patterns 99.9% of the time, though I do sometimes draft my own from existing garments, and stretchy fabrics are (obviously) a lot more forgiving when it comes to fit! Plus it means less zippers I have to sew!

Apologies for the butt shot, but that right there was my whole motivation for recycling this tee into something I will actually wear! Yes, it says 'bio-diesel' on my rear. Why not?

I made it knee-length which I think makes up for the back view and keeps it cheeky (oh, the puns!) rather than sleazy. Perfect for rocking with some wedges for a vintage vibe!